Bite Back at Henbit

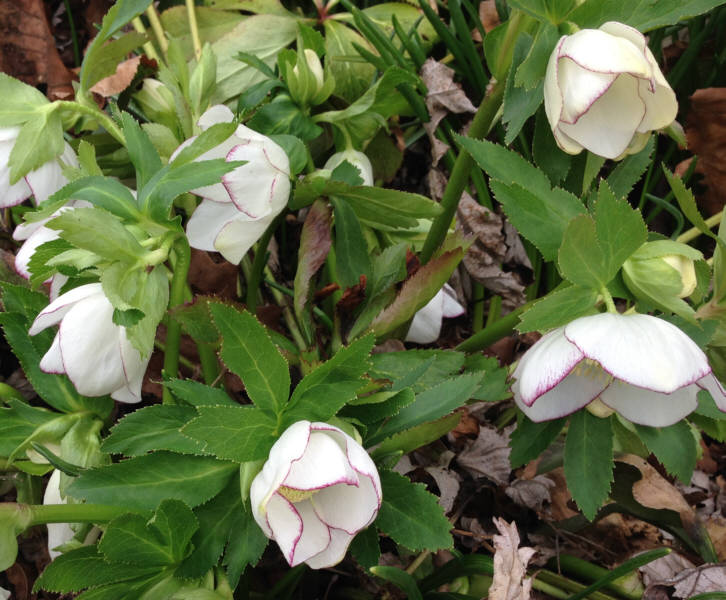
Come visit and take a look in our gardens, you’d surely soon guess my favorite color in plants. From light lavender to a deep, nearly black – purple – it’s present in every bed and during every season.

But not every purple flowering plant is a keeper. Henbit – OH NO! I have no idea where it came from but it’s everywhere in our garden. Lamium amplexicaule officially is a member of the mint family, flowers during cool weather and is present throughout the US.
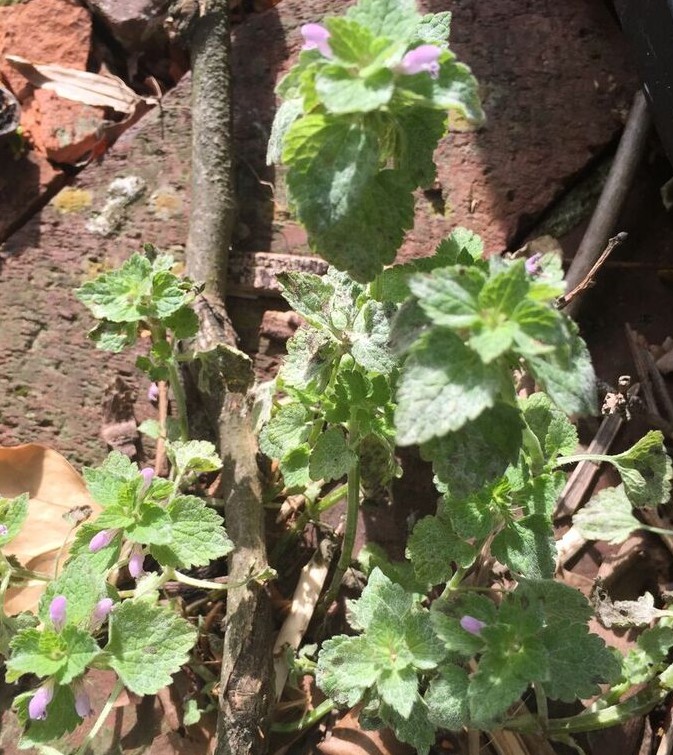
Henbit plant

Henbit – GO AWAY!

Mulching

My favorite method, so I’ll mention it first. Spread newspapers, flattened cardboard boxes and junk mail around the plants and cover with a thick layer of compost or mulch. Instantly, the beds look great and cared for and weeds stay suppressed all season. You may be tempted to go for weed fabric or plastic – resist and use biodegradable paper. It’s better for the environment and there will be no need to wrestle with bits and pieces of material a year or two down the road.
Don’t give weeds a chance to get started!

Hand Weeding

What other activity can you think of that is so destructive and rewarding at the same time?
While not having to hand weed would be the best option at all, no amount of mulching and using groundcovers will eliminate weeds completely. Henbit seems to only need a single ray of sunshine and a speck of dirt to grow into a fine specimen plant!
Try to disturb the ground as little as possible and avoid disbursing weed seeds (don’t shake off the plant) before tossing it. Use a hand weeder or a pair of clippers to cut off at the base. repeat as needed and sooner or later, the roots will be exhausted and incapable of sending up new growth.

Growing Daylilies from Seeds

Are the pods ripe? If it’s been about 7-8 weeks since fertilization and the pods are beginning to turn brown or open up at the tips, the seeds are ready to be harvested.

Collect the seeds and soak them in warm water overnight. The next day, put them in a zip-lock type bag and place the bag in the crisper drawer of your refrigerator.  Daylily seeds require a minimum of 4 weeks cold stratification before they will sprout.  Important: Label your bag prominently so your harvest won’t accidentally end up on your dinner plate.

daylily seeds

daylily seeds

When you are ready to plant the seeds, remove the bag from cold storage.  Check first.  Have the seeds already started to sprout?  If yes, you can go ahead and plant them.  if no, add some water to the bag and leave out in a dark and warm location. For the next week, check daily to see if seeds are starting to germinate.  If there are no white feet popping out, put the bag back into the crisper for a week as the cold period needs to be extended a bit more.

It’s time to plant, what to do?
Plop seeds into pots filled with potting mix and place in a warm and sunny location.  How deep to plant?  Some sources recommend covering with about an inch of potting mix, others suggest they will do fine gently pushed on top of the mix as long as they are kept moist.  I either bury them or cover the pot loosely with piece of plastic kitchen wrap because I tend to forget to mist them as frequently as they like.
Watch for green leaves and once the plants are about 5-6 inches tall they can be planted out in your garden. Soon, you’ll have completely new daylily varieties – that may or may not look anything like their parents – growing in your garden.

The Finest Figs

Have you ever eaten a fresh fig? Figs have almost no shelf life, and so are not usually sold in grocery stores. Unless you are lucky enough to either have a fig tree in your yard or you have a friend with a fig tree, you may not have had the pleasure of eating a perfectly ripe fig.

One of the great pleasures of growing edibles is the ability to grow things you can’t easily get a the store. For instance, even though you can usually purchase heirloom tomatoes in a rainbow of colors when they are in season, you can’t usually buy marinara sauce made from heirlooms. But if you grow your own, you can make whatever you like from them!

2014-09-03 15.13.16 (Small)Figs are delicate. They have a delicate flavor, and they don’t pack or ship well. They are best consumed within hours of being picked. Of course, if you have a tree full of figs, you may not be able to eat them all as soon as they are ripe — though Belle tells me that she and Jeff wish every year that their tree would produce more figs!

There are several ways to use ripe figs, from recipes like bacon wrapped figs to making fig preserves. Here are some great directions for freezing figs from pickyourown.org. Then, you just thaw them, and eat them whenever you feel the need for a taste of summer.

Belle and I had lunch at Community Pie a couple of summers ago and she ordered sweet fig pizza with prosciutto, Gorgonzola, kalamata olives, goat Gouda fig preserves, and arugula, and it was absolutely delicious! If you make your own fig preserves you’re sure to find plenty of creative ways to use them, as long as you don’t eat them all up on toast, which is probably what I would do.

Fig trees are easier to grow than many other types of fruit trees, and they make a lovely addition to the landscape. Figs should be planted in the spring, so you have plenty of time to plan and order yours!


Celebrate your Garden

Last night, a lovely Friday night with a gorgeous, bright full moon shining down, my family began what is sure to be a long process: preserving the harvest. We’d picked beans several times through the week and picked even more before sitting down to string and snap them. Next came washing and canning. We managed to get 14 quarts canned by midnight; there are that many more to process today.

We expect there will be that many each week until the end of the season. In the meantime, the okra is quickly ripening. We aren’t sure yet just how productive it will be, but it could well be just as generous as the beans. Since pickled okra is a family favorite, we will be happy to have plenty of jars on our shelves. I’m not so sure how we will feel packing that 130th jar.

Canning

Canned fruit. Picture courtesy of J. Sc.

Then, there are tomatoes. We have fewer tomato plants, but there will certainly be enough that some of them will need to be preserved. So far, the squash has produced in smaller quantities, but within a month or so, it’s likely there will be quite a lot of it as well.  And the corn…barring any groundhog or crow attacks, we are expecting somewhere between 800 and 1200 ears of corn.

All of this leaves out the grapes, blackberries, blueberries, and apples. There will be much smaller quantities of those to deal with, but we do want to try some jellies. The question is: how much can people who have other jobs and other responsibilities get done? The truth is, some of our harvest is likely to feed the birds, or will add nutrients to the soil as compost.

We’ll do what we can, of course, but we probably won’t get every bit of value from this year’s harvest. And that’s okay. There won’t be any guilt for not getting that last jar of beans canned, or making that last batch of chow chow. Instead, we will celebrate the achievements of the season. We’ll count our jars and feel a bubble of pride, and look at the stacks of bags in the freezer and know we did just fine this year.

It’s easy to let the responsibility of the garden become a burden. Avoiding vacations, spending every free moment either picking or processing the harvest, and worrying about what you aren’t getting done when you are doing anything other than garden related chores can suck the pleasure right out of your garden.

Do what you can and don’t sweat the rest. Very few of us are subsisting from our gardens, so it’s unlikely you will go hungry if you miss a few beans or a tomato hits the ground. Enjoy what you do harvest, and celebrate your garden!

Raspberry Jam

Raspberry jam. Picture courtesy of S. B.

How to divide and plant Iris

The first thing you should know about dividing iris is that iris are tough. Most iris can withstand an amazing amount of neglect and rough handling. This is not to say you should abuse your iris, but you also don’t need to worry too much when you are working with them.

Most planting guides recommend that you divide iris about 3-4 weeks after they have finished blooming. There’s a high likelihood that they will not bloom the year after you divide and transplant them. They are just settling into their new home; you didn’t kill them!

Iris grow from rhizomes (the solid part between the leaves and the roots) . Each iris rhizome will bloom only once – and this rhizome is largest right after the flowers are done blooming. When your iris are getting crowded, you can often see the rhizomes, sticking out of the ground a little. The fact tIris plant after blooming
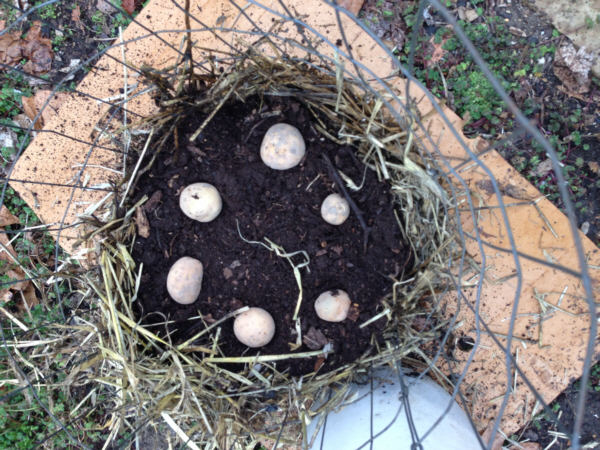
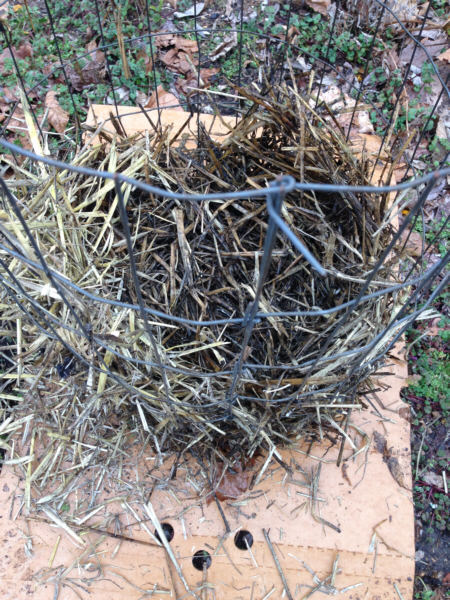
he rhizomes are so shallow makes them really easy to dig up. The easiest way is to use a fork — simply insert the fork near the edge of the rhizome and wiggle it around a little and it will pop up easily.

Brush the dirt off so you can see the rhizome and have an idea of what you are working with. Some guides suggest that you’ll need to get out the hose and thoroughly clean the rhizome. There’s no harm in doing that, but it won’t make a bit of difference if you skip this step.
trimming iris rootsTrim back the leaves to about 3 inches.  You can cut them into any shape you want, straight across or fans, even zigzag! Then trim all the roots to about an inch long below the rhizome and

Cut or break off your baby iris rhizomes from the center ‘mother’.  If there are no new babies on the mother yet, plant the mother.
Most likely there will be many more iris then you have space in the old location, either plant them in a new spot or share the extras with your friends and neighbors. Baby iris ready to plant
To plant, insert your rhizomes up to its neck into the ground and water them in. You should not be able to see any part of the rhizome sticking up.
I know you’ve heard that the rhizomes should be above the ground and ‘be kissed by the sun’.  If you plant them too high, they are much more likely to #1 fall over and uprooted on the new roots they are developing and #2 dry out and die.  Pretty much all iris nurseries and hybridizers from Canada to Australia plant their iris ‘to the neck’.

Newly planted iris

Newly planted iris


Success with Helleborus Seeds

If you look underneath your big plant and see all the volunteer babies, you’d think it would be quite easy to collect the seeds and plant them in a container or a new location and end up with lots of new plants shortly.  It’s not quite that simple but it’s also not as difficult to get the seeds to sprout as some people will have you believe.

The challenge lies in giving the seeds just the ‘right’ environment as they require stratification. There’s lots of info about so many weeks of warm, moist and so long in cold, moist to induce germination.  You can get as scientific about the process as you like.  But I like EASY.  So here’s my EASY method for sprouting hellebore seeds.

Brick and helleborus seeds
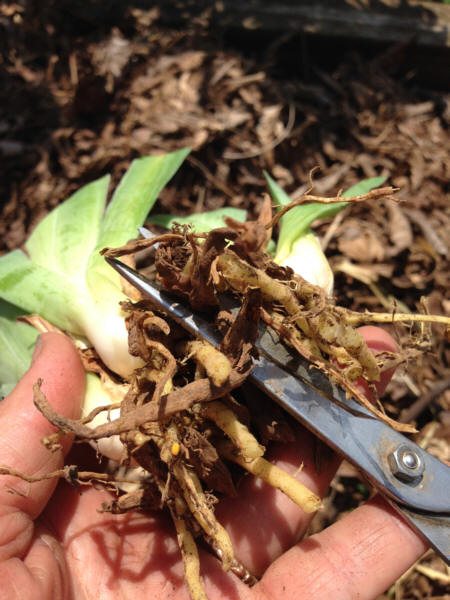
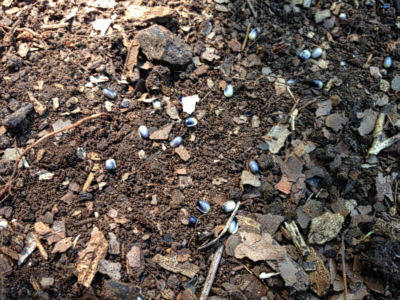
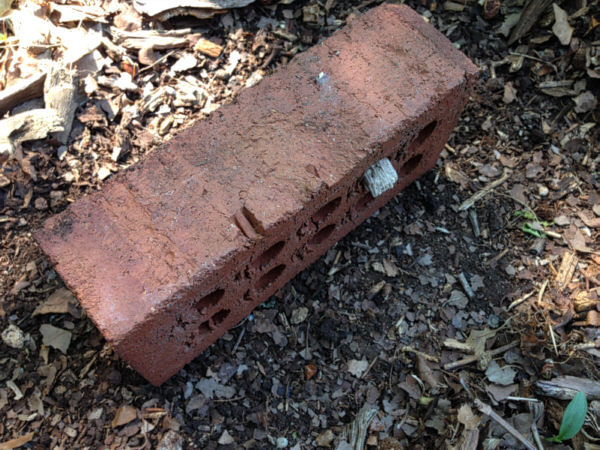
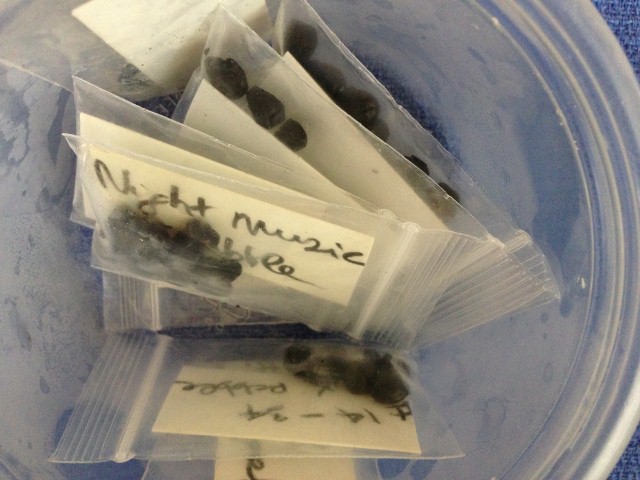
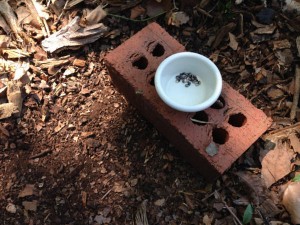
You will need one brick for every 15 to 20 seeds. Collect the seeds when they are ripe and fresh, usually sometime in May for most locations. Plant your seeds as es soon as possible after purchasing or collecting, you’ll want them in the ground by the end of June at the latest. Select your new planting spot. Just rough up the soil a little and sprinkle your seeds.  Top them with the flat side of your brick.  You’re done!
helleborus seeds in soil
The brick will hold the seeds in place, provide just the proper environment both moisture and temperature wise to allow your seeds to do their thing.  In warmer climates without snow cover, lift-off the brick in mid-January of the year following planting.  brick on top of helleborus seedsYou may have tiny little seedlings that are flat like pancakes, don’t worry, they’ll straighten right up.  In colder areas with snow cover, whenever your snow has melted, lift the brick once a week and check for seedlings. As soon as you see babies, remove the brick.

It will take about 3-4 years before your new babies will be large enough to bloom and each baby will be a new plant that may or may not resemble its parent.  Here’s a picture of one of my seedlings that I really like a lot:

My burgundy  rim helleborus seedling

My burgundy rim helleborus seedling

Potato Tower

The end of an odd winter..Spring is here.
The morning air is crisp, the sun is warm, and baby plants are stirring. And with temperatures hovering around 50 degrees or so, it’s time to put out the potatoes here in Tennessee.
You may be familiar with our last potato tower experience, or maybe not.  It was nothing to write home about.  For one thing, I used grocery store potatoes. That’s a big No-No but I had to find out for myself.  Grocery store potatoes are treated with anti-sprouting agents and as you can guess, i ended up with a big pile of – Nothing.
This year, I am using certified seed potatoes and my towers is made with a combination of compost and straw.

Here’s whPotato Towerat you’ll need:
~ cardboard
~ a cage. I used a stretch of fencing joined in the round
~ straw
~ a bucket-full of compost
~ seed potatoes

potato tower step 1

Start by setting up the cage on top on the cardboard,  this will go a long way in keeping the weeds out of the potato tower. Next, add a thick layer of straw to the bottom of the cage, top the straw with your 2/3 of your compost.
Potato Tower step 3
Push the seed potatoes into the compost and cover with Potato Tower step 4the remaining compost.  Top with another layer of straw.
Once the potatoes sprout out, keep adding straw to the tower, keeping about 4 inches of greenery exposed at all times.  Stop adding when the plants set blooms.

So far it’s looking good, don’t you agree?

The Sides of March

Welcome spring! I hope you are here to stay.

As the temperatures are rising and the sun is smiling on the plants, it’s time to take stock and see which plants have survived this arctic winter. I think the part that was toughest on our plants were the really low temperatures in absence of snow (insulation) cover.  The hellebore in pots, for example, had a distinct dislike for that environment and are still sulking.  The potted heuchera, on the other hand, have started to leaf out.  It’s time to repot and trim, ruthlessly.
If your heuchera are in the ground, be sure to give them a good look over If they have heaved or have grown stalky, either replant them deeper or mulch well around their base.

Remove the ratty foliage and give your heuchera some breathing room – they will reward your efforts in no time with lots of nice, fresh, lush foliage.

Heuchera

Top row of potted Heuchera plants has been ‘de-rattified’.


Growing Grapes: A Beginners Perspective

Guest column written by Dava Stewart

For several years, I looked at grape vines in seed catalogs. I read about raising them, and

seedless red grapes

Seedless grapes, variety Mars

felt my skills might not be up to the task. Then, four years ago, my dad brought me a plastic bag with a bare vine in it. I have no idea how long it was in the bag before he brought it, but it took me a few days to get around to planting it. My hopes were not high.

But, that spring, it turned green and started growing like crazy. I had a gate from an old chain link fence and stuck it in the garden for the grape vine to climb. That first year, it covered the gate, and seemed happy and healthy.

The next spring came along, and the grape vine continued to thrive. After a little more reading, I did some careful pruning. I went out and checked every couple of weeks to see if there were any flowers or evidence of impending grapes.There never was. I read some more. My dad expressed the opinion that the galvanized fencing on the old gate was bad, and that’s why there were no grapes. Belle has since explained to me that grape vines have to be 2-3 years old before they begin producing.

Third year: I took the vine off the gate and planned to move it to a different location (it was a year of moving the entire garden). The key word in that last sentence is “planned.” The move never happened. As summer ended, I found three fat, sweet grapes on the vine! It was sprawling everywhere, tangled with grass and weeds, and in a completely messy area of old garden. There may have been more than three grapes, and I just couldn’t find them for all the mess.

This spring the story of my grape vine will continue. Maybe moving it (finally!) won’t mean three more grape-less years. But if that’s the case, so be it. Watching for grapes is almost as much fun as eating them!