The Apple Jelly Saga — Part 2

A few weeks ago, I wrote about my first attempt at making apple jelly. (spoiler alert: it didn’t go well) As promised, this is the sequel to that post. It’s a good thing the apple trees were productive this year…

The Second Attempt

Making true apple jelly means extracting the juice from the apples. In all my research, it seemed that most folks cooked the apples until tender then hung them in a cheesecloth bag or strainer over night and let the juice drip down into a bowl.

Since making the jelly on my own was a failure, I decided to get the family involved on the second attempt. The apple trees grow on the family farm, after all. We didn’t have any cheesecloth, but we did find a new, clean, white undershirt — you know the kind commonly called a “wife beater.”

We cooked down the apples, then pulled the shirt over a huge mixing bowl. Of course when we put the apples into the shirt, it just fell down to the bottom. Since we are creative people, and there were about 10 of us trying to come up with a solution, we knew there had to be a way! There was: duct tape.

We taped the shirt to the bowl so that it wouldn’t fall down, put the apples in, and covered the whole mess. The next day…there was about ¼ cup of juice in the bottom of the bowl. I still don’t understand why our brilliant idea didn’t work. But, since it takes about 7 cups of juice to make a batch of jelly we were out of luck. Again.

At this point, I was ready to abandon the entire idea of making a sweet, preserved treat from the apples. I was leaning heavily toward slicing them and making half-cooked pies to freeze and use all winter. Because apple pie, right?

The Third Attempt

Then, I came across this recipe for Rosemary Infused Apple Preserves, and noticed that
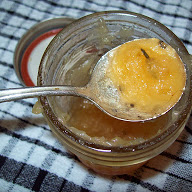
I left the rosemary instead of removing it like the recipe instructed.

I left the rosemary instead of removing it like the recipe instructed.

you used the whole apple — no need to extract the juice! I had to try one more time. Happily, the same day I made preserves, I’d promised to show a cousin how to bake homemade bread. We ended up with fresh, hot bread and homemade preserves. At the same time! It was a moment of culinary bliss.

This recipe resulted in something that seemed more like applesauce than it did anything else — but the most flavorful applesauce I’ve ever had. Since I’m a rebel, I didn’t really follow the recipe. Here’s what I did instead:

  • Peel, core, and chop the apples
  • Cook until they are soft, with a few sprigs of rosemary
  • Taste
  • Add the desired amount of sugar (I used significantly less than the recipe called for)
  • Squeeze the juice of a lemon in
  • Cook until the sugar is dissolved
  • Mash and stir until you have a consistency you like
  • Load into clean, sterilized jars and process in a water bath


I haven’t tried it yet, but these preserves would be delicious with a strong cheese. Or maybe with a pork roast. Definitely on breakfast toast. Next year, I’m skipping the jelly attempts and going straight for these preserves!
The Apple Jelly Saga – Part 1

Last winter, I planted several apple trees — two in my yard, and four at the family farm. Of the two in my yard, one is doing spectacularly. It needs to be pruned, but is healthy and growing well. The other was the victim of a small accident — my husband cut down a small mimosa growing on our fence line and it fell directly onto the apple tree, breaking most of its tender branches and splitting the trunk all the way down to about a foot off the ground. But it came back! I couldn’t believe it when I found new growth all around where it had been split. We’ll see what it does next year.

Of the trees at the farm, one appears to be dead, another is living but suffering, and two others are doing well. I’ve tried to identify the pests and/or disease that killed the first one, but apples are susceptible to so many different things. We are lucky to also have two fully mature, producing trees at the farm! They are old — they’ve been there as long as I can

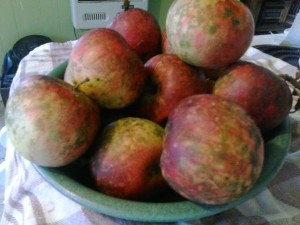
They may not be grocery store pretty, but they are farm fresh delicious!

They may not be grocery store pretty, but they are farm fresh delicious!

remember — and no one is sure what variety they are. The fruit is small, splotchy red, and very slightly tart.

This year, they both produced heavily so I decided to try my hand at making apple jelly. Then I read some recipes and decided to try apple preserves instead! What I actually ended up with could be more accurately described as apple flavored syrup with pieces of apple…Here’s the recipe I (sort of) followed: http://www.tasteofhome.com/recipes/caramel-apple-jam.

I say “sort of” because I did things out of order, which, no doubt, was the downfall of my preserves. I put everything in the pot together and simmered it until the apples were tender, then brought it to a boil and then put it in sterilized jars. It didn’t gel. Live and learn,

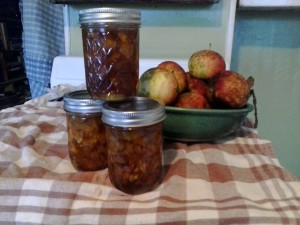
The jars look nice, anyway!

The jars look nice, anyway!

my friends.

On a positive note, that apple syrup will be perfect for sweetening oatmeal and for eating with pancakes. AND — there are plenty of apples left to try again. This time, I’m going to go with a traditional jelly recipe, and follow the instructions much more closely. I’ll let you guys know how it works out!


Violas, Violas Everywhere

Weeding.  There no other garden chore that is so destructive and satisfying at the same time. With elbow grease, plastic, paper and heavy mulching, we’ve managed to remove many undesirable plants from our garden.  One of the plants that has been defying all our efforts to this time has been violas.  Not African Violets but those little, pesky, violet spring blooming flowers that pop up in lawns and shady areas.

This year, I am sparing them from the sharp edge of the weeding tool.
Why?  Sweet Violet Sirup.
On our walking trip along the Le Puy Way of the Camino de Santiago this summer, one of the most refreshing drinks we encountered was chilled violet water made from home-made violet (viola) sirup. It’s the French answer to Iced Tea and much tastier.

Here’s the recipe:
1 cup viola flowers, remove stems and rinse. Put into a glass (Mason) jar.
Pour 1 cup of boiling water over the flowers and let mixture sit covered for 24 hours.
Put mixture in saucepan, add 1 cup sugar and bring to a low boil, stir until all the sugar has dissolved.  Strain through a fine sieve or cheesecloth, label bottle and store in a cool place for up to 12 month.

A little of the sirup goes a long way; add to plain or sparkling water, ice cream, etc.

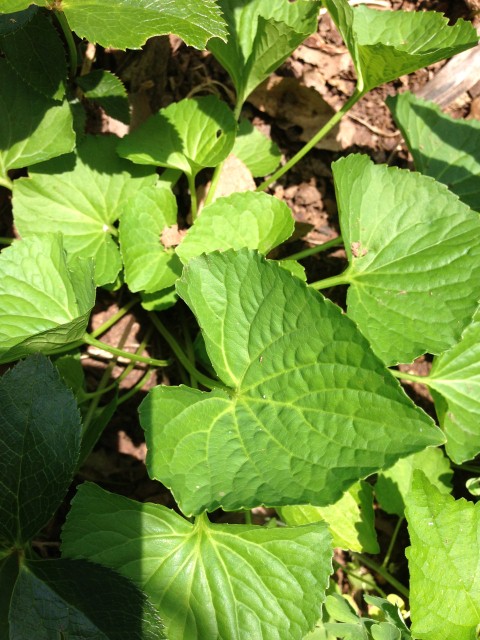
Viola Plant

Viola Plant

Walking Onions

Generally, when people think of onions, they are thinking of the annual plant we all know and love. Vidalia, red, green, yellow, white…there are enough types of onions to keep pretty much anyone’s mouth happy! A couple of weeks ago, Belle asked if I’d like to write about “walking onions.” Since I had never heard of them before, I enthusiastically agreed — it’s always fun to learn something new.

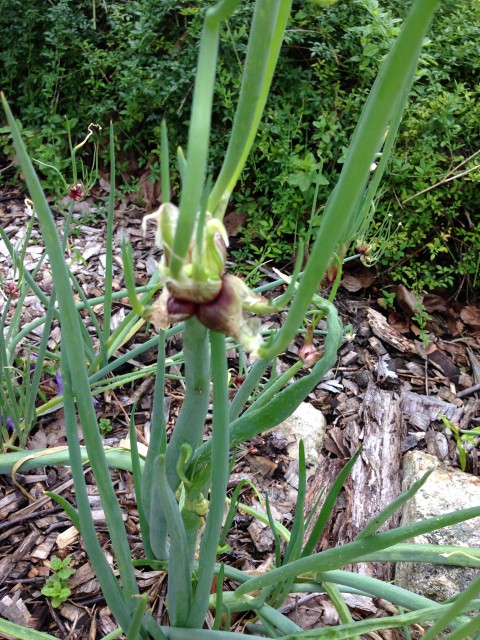
The scientific name for these perennial onions is Allium proliferum, and they have many common names in addition to walking onion: topset onion, Egyptian onion, and tree onion. The difference between this variety and the common onion we all know and love is the fact that these onions form tiny “bulblets” at the tops of the leaves. In other words, they are “topsetting” onions.
walking onions 03 (2) (Small)walking onions 02 (Small)Eventually, as the leaves dry out and the bulblets get heavier, they fall over. When soil conditions are right, the bulblet will form a new plant. Over time, they will “walk” across the garden, as the plants fall over and reseed themselves. Topsets do not form the first year, though the plants will come back in the spring.
All parts of the walking onion plant can be eaten; however, harvesting the bulb cluster will prevent the formation of the topset. Leave a few if you want to grow them as perennials. The leaves are often used in the same way people use chives or green onions, and the bulb is similar to a common onion, though some people say they are a bit stronger-flavored.

One of the most intriguing things I read was that the topsets can be harvested and either eaten right away, or preserved by pickling. With the recent popularity of pickling on cooking websites, I thought there might be a recipe out there. Sure enough, I found this one on a website called Dave’s Garden.

Now I want to taste an onion topset — pickled or not! Plus, they are really cool looking plants. They grow year-round in mild climates, and though they can be planted any time, are best planted in the fall. I’m definitely adding these to my (ever-growing) fall planting list!

Do you grow onions? What varieties are your favorites? Have you ever pickled onions? 

Starting Herb Seeds

Herbs add color, fragrance, and texture to the garden — not to mention flavor and variety to the kitchen. Many are perennials and few require special care.  In my time as a haphazard gardener, I’ve grown herbs almost every year. Lots of them have died, due to neglect and/or ignorance, but I have finally hit on a method that works for me. Growing herbs from seed is the most economical way to go, but if you find seeds challenging you might be reluctant. Maybe my method will work for you, too.

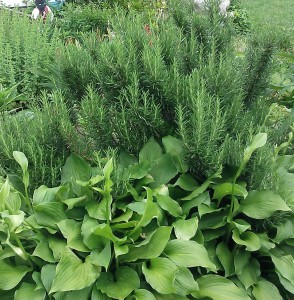
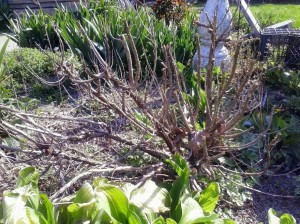
Rosemary is probably my favorite herb, but thyme, oregano, sage, tarragon, cilantro, basil, and parsley are also usually in my beds somewhere. The viciously cold weather last winter seems to have killed my rosemary, so I’ll be starting a new one this year.

Last summer.

Last summer.


This spring.

This spring.

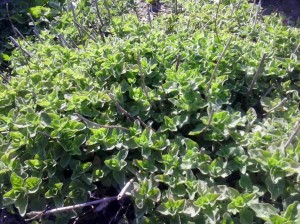
The oregano did just fine.

IMG_20140421_101013

So did the sage, which was surprising because last year was its first year in the ground. I thought it would still be tender.

IMG_20140421_101041

I tried, unsuccessfully, to grow rosemary from seed for a number of years. It would usually germinate just fine, then whither away. The plant that died last year was about four feet tall and absolutely luscious. I would touch it every time I walked by to enjoy its piney scent. The trick for me was to keep it in a pot for a few years.

That has turned out to be the best way for me to grow a number of perennial herbs — get them started in a pot, and bring the pot in over the winter for 2-3 years. Then, when it is firmly established, it seems to do better planted in the ground.

The method I use will probably never be endorsed by any expert, but it has consistently worked:

  1. Fill a pot (any pot with drainage) with potting soil.
  2. Sprinkle some seeds around.
  3. Put the pot outside.
  4. Keep the soil just damp.
  5. Start picking leaves off to use for cooking as soon as there are leaves to pick.
  6. Bring the pot in for the winter.
  7. After 2-3 winters, transplant to the garden.

Of course, some herbs, like basil and parsley work better as annuals, and I just plant new seeds each year for them. Others, like mint and chamomile can be invasive. I don’t mind if they start spreading, but you may prefer to keep them in containers rather than transplanting them into your garden.

Growing herbs from seed is inexpensive, and can have big rewards. It’s certainly worth trying if you haven’t.


Growing Grapes: A Beginners Perspective

Guest column written by Dava Stewart

For several years, I looked at grape vines in seed catalogs. I read about raising them, and

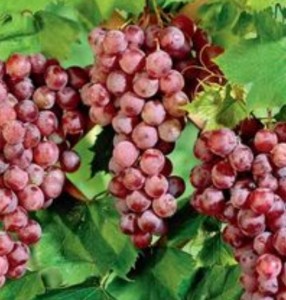
seedless red grapes

Seedless grapes, variety Mars

felt my skills might not be up to the task. Then, four years ago, my dad brought me a plastic bag with a bare vine in it. I have no idea how long it was in the bag before he brought it, but it took me a few days to get around to planting it. My hopes were not high.

But, that spring, it turned green and started growing like crazy. I had a gate from an old chain link fence and stuck it in the garden for the grape vine to climb. That first year, it covered the gate, and seemed happy and healthy.

The next spring came along, and the grape vine continued to thrive. After a little more reading, I did some careful pruning. I went out and checked every couple of weeks to see if there were any flowers or evidence of impending grapes.There never was. I read some more. My dad expressed the opinion that the galvanized fencing on the old gate was bad, and that’s why there were no grapes. Belle has since explained to me that grape vines have to be 2-3 years old before they begin producing.

Third year: I took the vine off the gate and planned to move it to a different location (it was a year of moving the entire garden). The key word in that last sentence is “planned.” The move never happened. As summer ended, I found three fat, sweet grapes on the vine! It was sprawling everywhere, tangled with grass and weeds, and in a completely messy area of old garden. There may have been more than three grapes, and I just couldn’t find them for all the mess.

This spring the story of my grape vine will continue. Maybe moving it (finally!) won’t mean three more grape-less years. But if that’s the case, so be it. Watching for grapes is almost as much fun as eating them!


A Day in the Life of a Backyard Nursery Owner

One of my friends asked “What do you do in your business when it’s not planting time?”

mhmhmhmzzz.  The list is long.
Today, I started by watering the plants and misting the cuttings in the greenhouse.  Then I swept the greenhouse floor and turned into plant detective.  I looked for critters such as aphids and spider mites and any signs of diseases that love infesting greenhouse plants.

Next, I finished printing shipping labels and getting packages mailed out. While doing so, I noticed that I was out of the Tennessee Shipping Notification certificates that are required for plant shipments.  So the remainder of the morning was spent on printing and filling out a, hopefully sufficient,supply of the certificates for the spring 2014 shipping season.

After all that tedious work, first a lunch break and then a little fun activity:  Looking through one of the suppliers catalogs and the availability list.  Next, checking the business budget to see how much money is available for purchasing. Happy Dance, followed by a call to the broker to order some more new products, followed by another happy dance when the desired items are still available.
Then checking and answering emails, printing out paperwork for orders that will be shipped tomorrow.  Pulling and packing products.
In between: Looking at Facebook. Answering the phone. Making coffee.  Making Tea. Running a load of laundry. Knitting a few rows.

Finally, just enough time left in the day to write this blog post and then I am off to an evening yoga class.

OH, you’re wondering what I may have selected?

Honestly, it wasn’t easy.  the catalogs are always so beautiful and the selection is difficult. Maybe you know exactly what that feels like?  My focus today was a few more edibles, particularly interesting edibles that won’t be on the shelves at the local box store.

Look for these new plants in our online store Edibles section later this month.
Hardy Kiwi, Goji Berry, Haskap Berry, Seedless Red Grapes, and Seed Potatoes.

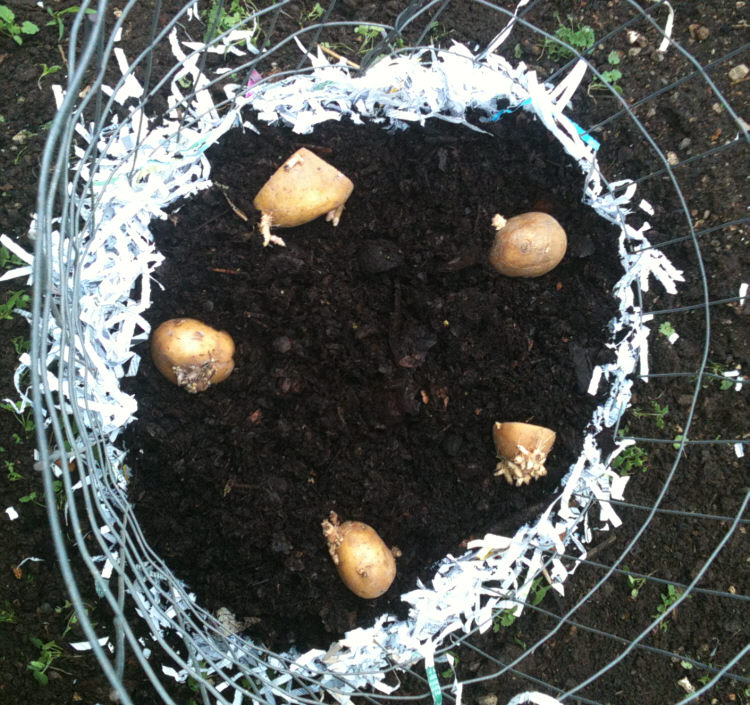
I am planning to do a potato tower this year. The last time I tried with store bought potatoes and it was not a success (despite how well the planting looked when I started out).  I have learned why and will share my experiences when the time comes to start the tower for the 2014 season.

Potato Growing Tower