Secrets of Successful CLEMATIS PRUNING

Are you wondering whether you should prune your clematis plants in Spring?

There is a ton of information on the internet to tell you when and how to prune your clematis for best flowering and encouraging full growth. One can spend hours reading about all the different types and the pruning recommendations. By the end of the day, however, spring pruning boils down to this:

If it blooms before June, don’t prune.

Blooming Clematis

You can spring-prune your autumn clematis and other late summer blooming clematis by cutting them down to about 1/3. That will remove ratty, left-over foliage and promote fuller growth and flowers for this season.

Don’t have any clematis? They are carefree plants that will climb up on most any support and attract pollinators while looking spectacular at the same time.

Click here to see our clematis – great varieties and prices – guaranteed!

Dividing Hosta in 3 EASY Steps

Star of the Shade Garden – Hosta

With these nice warm days, I know I have been itching to do some gardening. Maybe you feel the same way? Don’t fall into the trap of putting out your summer veggies just yet. Instead, divide your hosta. Once the soil is is beginning to warm up a little, it’s a great time to divide hosta.

Dividing hosta, according to my reading, is a big job and can be super intimidating.Dig 18 inches from the plant, then wash the roots so that you can see what you are doing. Then there is something about the crowns…I’ll admit, I quit reading at that point…

Maybe you’ve separated hostas like that before, however, they will be quite happy if you just go and do the EASY 1-2-3 method.

  • Dig in a circle around each plant, beginning about two inches from the base and pry them up using a shovel and possibly brute strength
  • Turn them over and chop them into sections with an ax
  • Put the sections into their new locations and tuck them in, then water well

And here’s some advice from my friend Dava:
“It’s better to try things and take risks in the garden than to be paralyzed by the fear you will hurt your plants. You may kill a few, but, more likely, you will end up with a beautiful garden that brings you hours of enjoyment.”


So go and get those hosta separated, you may even have extra to share with friends and neighbors!


Come and check out our selection of beautiful hosta, light green, huge, tiny, patterned leaves….there’s always just one more I have to add every spring.

Daylily Dividing in 3 Easy Steps

Too many Daylilies.  Said nobody.  Ever.

Probably the most known and common method of propagation is digging up the root ball and dividing the rhizomes. This can be done most anytime the plant is not in bloom. Ok, I admit, I have dug and divided them while in bloom but I can’t think of any reputable garden source that recommends this method! Generally, most sources suggest tackling this task in fall or early spring.
daylily divisions
1. Dig up the clump

2. Divide by pulling or cutting apart the root ball

3. Trim as needed, replant or share.

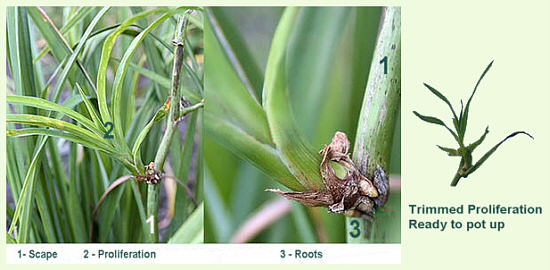
Another, lesser known, method is to harvest the proliferations. After the daylilies have finished blooming and before the stalks turn completely brown, it’s a good time time to check the scapes for proliferations. Cut any you find with about 2 inches of stalk remaining and pot them up. Don’t have any pots around? Put the ‘baby’ in a glass of water. Be sure to label them so you’ll know “who’s who” in the spring.
Keep them in a sunny window for the winter before transplanting them back into the garden come spring. This proliferation will be an identical twin to the parent plant.
Daylily ProliferationsIn just a little time, you have increased your supply of lovely daylilies for your own garden or as gifts to your family and friends.

Belle’s Best Rhubarb Pie

Rhubarb Pie

Rhubarb Pie

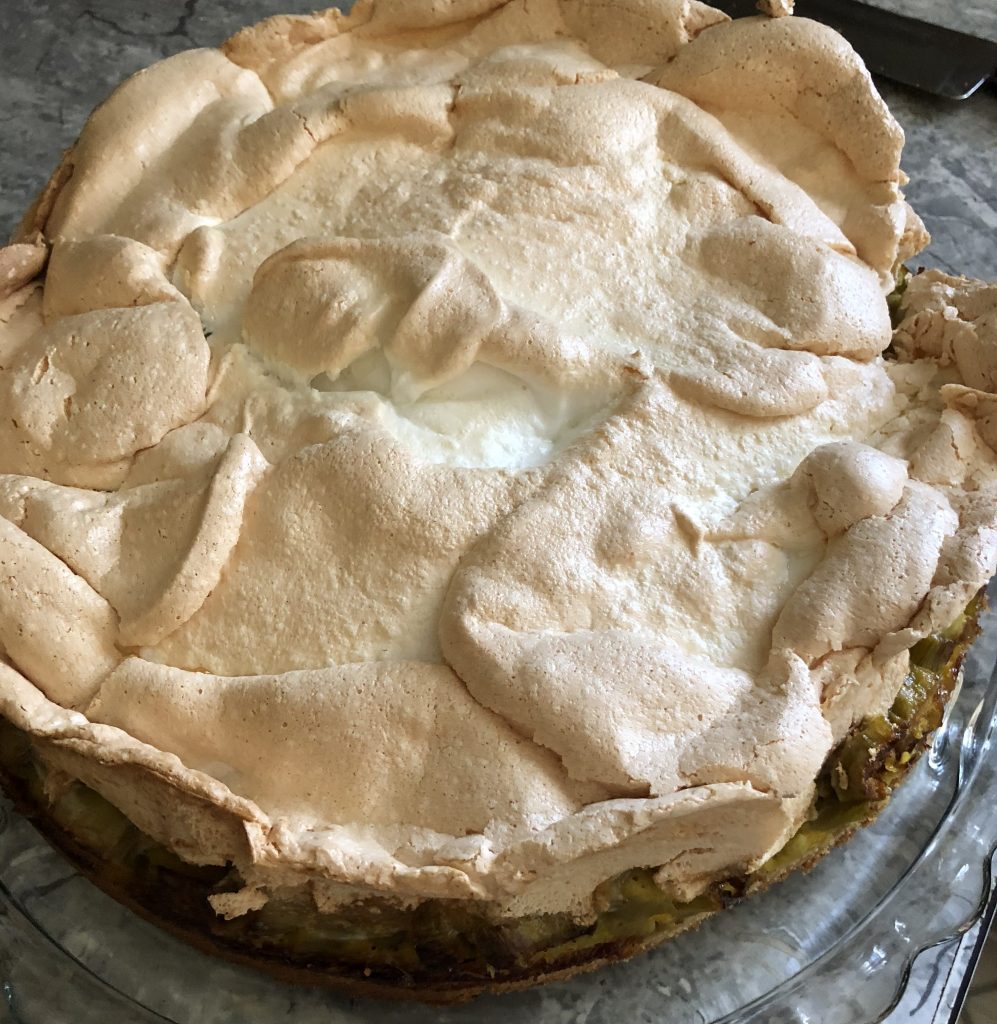
Rhubarb Pie: The combination of cake base, tart rhubarb filling and sweet topping is irresistible.  I bake mine in a springform pan and it is always gone in no time.

  • Wash and cut 6-8 stalks of rhubarb into bite-size pieces.
  • Mix 5 egg yolks with 1 package Vanilla Pudding Mix (the type that needs to be cooked) and pour over the rhubarb. Stir until well coated and set aside.
  • Make Meringue. Beat 5 egg whites until peaks form, add in 3/4 cup sugar while continuing to beat the mixture. Set aside.
  • Make Cake base:
    1 stick butter – softened
    1/2 cup sugar
    1 egg
    2 cups flour
    Mix the sugar and butter with a wooden spoon until it stops crunching. Add the egg and then the flour. Use your hands and mix the crumbly dough until it sticks together. Grease your springform and spread dough across the bottom, poke a few holes into it with a fork. Spread 1 tablespoon breadcrumbs on top, I shake the pan a bit to distribute the crumbs evenly. Pour the rhubarb mixture in and spread out evenly. Bake at 350F for 30 minutes. Remove from oven, spread the Meringue on top and bake 8-12 minutes longer until top is lightly browned.
    Remove from oven, let cool a bit and enjoy. Refrigerate leftovers – if you have any…

Ingredients List:
6 eggs
2 cups flour
1 stick butter
1 1/4 cup sugar
1 package vanilla sauce mix
1 tablespoon breadcrumbs

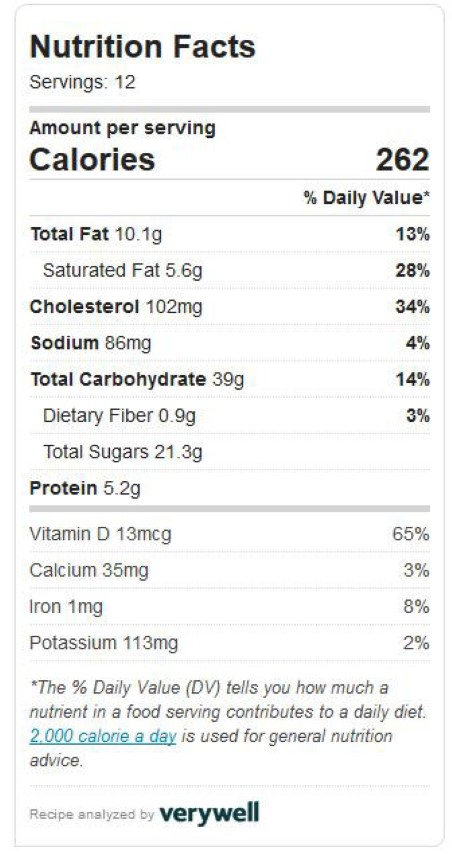
Makes 12 serving with ~265 calories each

Nutrition label

Nutrition label

Add rhubarb to your garden, it’s a carefree plant in all but the hottest climates.

Valentine’s Plantable Seed Paper Hearts DIY

I saw the video on how to make your own seed paper hearts on facebook and just had to try it out right away.
cover food processor with a towel
Once i dug through the baking closet to find my heart shape cookie cutters and through the paper closet for red paper, I was on my way.  Fast forward and here is my tutorial so that you won’t have to clean up your cabinets and kitchen like i did (or maybe your blender/food processor seals better!)

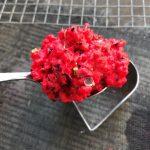
seeds added to paper mushUse 1 cup of paper pieces to 1 cup of warm water, let sit for a minute or two inside food processor.  Then cover food processor with towel and pulse until there is mush.
Add about a teaspoon each of 4-5 different types of seeds and blend them into the mush, I used a fork.  A smaller amount Creating the heartof seeds will go a long way, I was way too generous with my first batch.

Use a screen or a piece of cheesecloth as base, add a tablespoon of mush, then press down firmly.  Wait about 30 seconds or so and pull up the cookie cutter.

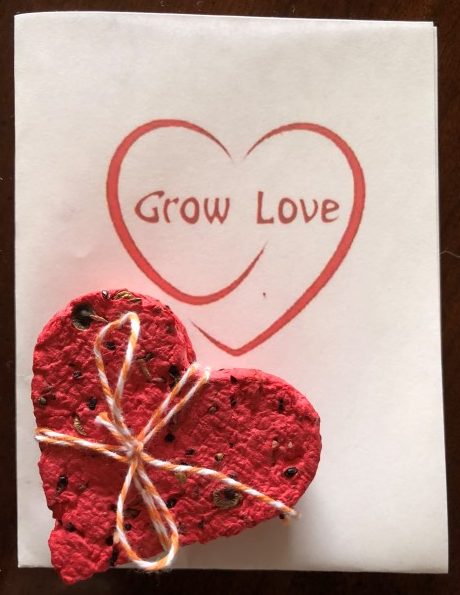
Paper Seed Heart

Let dry naturally for about 12 hours and the paper hearts are ready. Glue to cards and/or attach to chopsticks and insert into a plant.

Click here for my printable pdf gift card #1. I sometimes run a glue stick around the edge of the printed heart and sprinkle a little glitter on the gold colored background. Click here to download card #2, same inside.

foldable card

Card #1

foldable instruction sheet

Card #2

Bite Back at Henbit

Come visit and take a look in our gardens, you’d surely soon guess my favorite color in plants. From light lavender to a deep, nearly black – purple – it’s present in every bed and during every season.

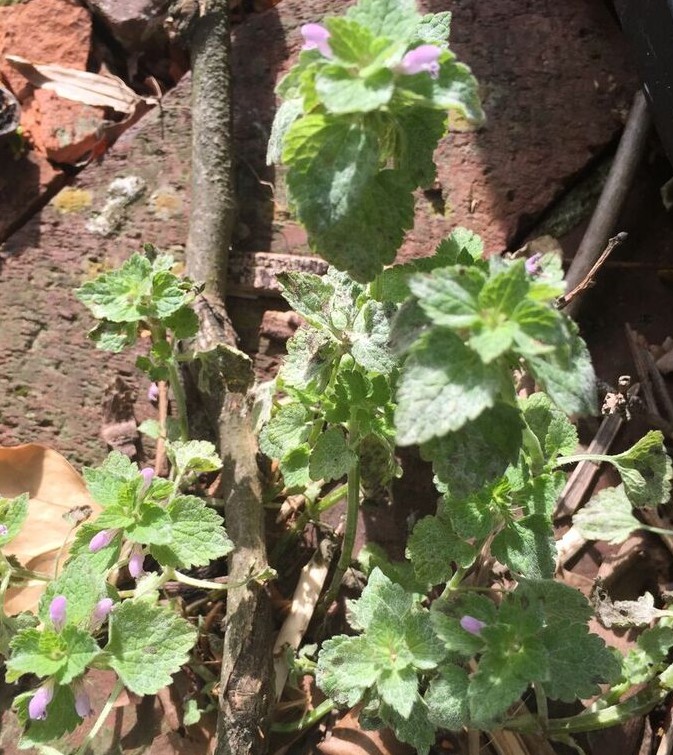
But not every purple flowering plant is a keeper. Henbit – OH NO! I have no idea where it came from but it’s everywhere in our garden. Lamium amplexicaule officially is a member of the mint family, flowers during cool weather and is present throughout the US.

Henbit plant

Henbit – GO AWAY!

Mulching

My favorite method, so I’ll mention it first. Spread newspapers, flattened cardboard boxes and junk mail around the plants and cover with a thick layer of compost or mulch. Instantly, the beds look great and cared for and weeds stay suppressed all season. You may be tempted to go for weed fabric or plastic – resist and use biodegradable paper. It’s better for the environment and there will be no need to wrestle with bits and pieces of material a year or two down the road.
Don’t give weeds a chance to get started!

Hand Weeding

What other activity can you think of that is so destructive and rewarding at the same time?
While not having to hand weed would be the best option at all, no amount of mulching and using groundcovers will eliminate weeds completely. Henbit seems to only need a single ray of sunshine and a speck of dirt to grow into a fine specimen plant!
Try to disturb the ground as little as possible and avoid disbursing weed seeds (don’t shake off the plant) before tossing it. Use a hand weeder or a pair of clippers to cut off at the base. repeat as needed and sooner or later, the roots will be exhausted and incapable of sending up new growth.

Forgetfulness in the Garden

As soon as it was warm enough, I was out in the garden digging around. I had a few hardy perennial seeds to put out, and decided last year to consolidate two or three beds into one big one so still had a few things to move. There was also a tall, floppy sedum that
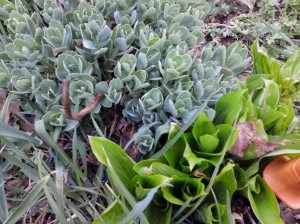
the consequences of bad (read: no) garden planning

The sedum ended up on top of a hosta. Now I’ll spend the summer seeing which one dominates.

needed to go from the center of the garden to the outskirts.

Anyway, there was almost immediately a problem: not everything was up and I had exactly zero markers. Deciding to rely on memory alone (yes, yes, laugh if you must), I planted some asparagus, moved the sedum, scattered some rudbeckia seeds, built a grape arbor, and moved some raspberry plants.

When it became obvious that markers are a necessity in my garden, I started researching different ways to make them (because of course I don’t want to buy them — that would be money that could be spent on plants!) There are some great ideas out there, and I just happened to have a bag of old silverware.

Flattening spoons and stamping names of plants on them seemed like a lot of work, so I decided to just stick them utensils in the ground next to the plants as they came up. Forks marked the hostas, for example. Immediately, my husband started listing off all the reasons this was a terrible idea (mostly he thought the dogs would pull the silverware up and scatter it all over the yard and make mowing hazardous). I ignored him and proceeded to plant spoons and forks all over the garden.

A couple of hours later, I was walking around, staring at the ground, looking for anything new popping up (I spend hours doing this every spring), and noticed that a fork was missing. The inevitable “I told you so!” was not long in coming…but then I found the fork — buried all the way in the ground. Someone had stepped on it!

Clearly ONE piece of flatware would not do the trick. The next week I planted a small
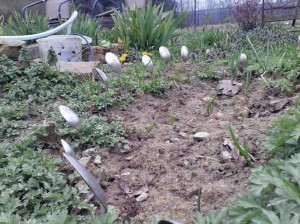
Spoon markers

Spoon markers

patch of onions, and used spoons to outline it.

While this works great for the onions, it’s not really practical for each hosta, coneflower, peony, and other perennial in my garden. The search for effective, attractive, and free markers continues!

Belle’s suggestions:
Try knives and write on them with a paint pen or a bit less attractive but  functional: plastic slats from window blinds and write on them with nail polish pens.


How to pollinate an Iris

Plant Sex.

Now that I have your attention, this post is all about taking a little pollen from one plant and dabbing it on the receiving part of another in the hopes of creating a unique new plant.

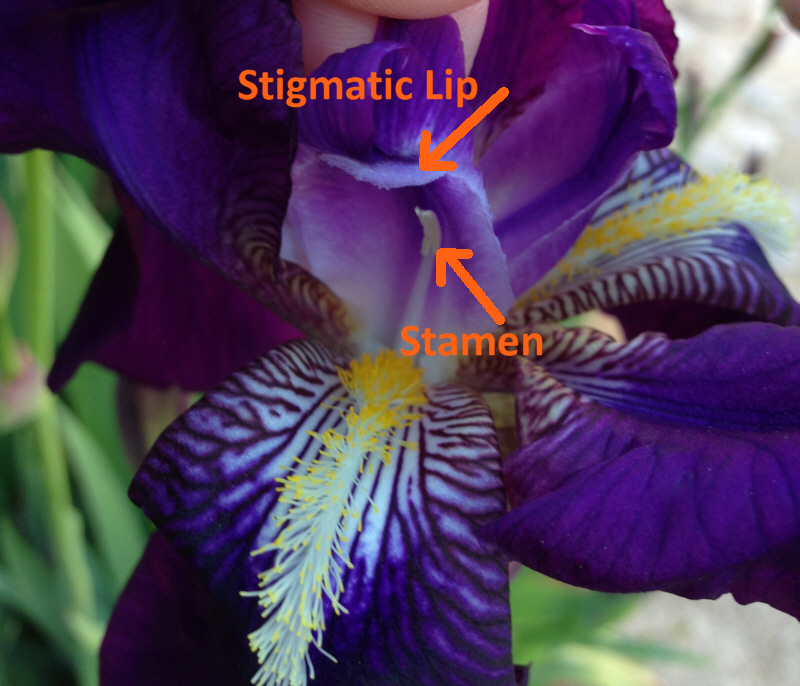
It’s essential to be able to identify the reproductive parts of a plant, and for an iris that’s not so easy.  Here’s your road map to get started. Find the beards. They look fluffy and inviting. Think of them as the red carpet, leading towards the door #1, the stamen and door #2, the stigmatic lip.  Those two structures are the necessary ones for the iris mating dance.

If you like to try your hand at hybridizing this spring, it’s easy.  Remove the stamen from one variety and rub it into or onto the stigmatic lip of another.  Wait  for about 3 days, if your efforts were successful, the base of the flower will start swelling and growing, eventually forming a fat, oval shaped balloon. Should your stalk break off the plant, don’t worry, just stick the stem into the ground and your pod will continue to mature! It will take about 6-7 weeks for the seeds to be ready for harvesting.

reproductive parts of an iris


Hummingbird Nectar Recipe

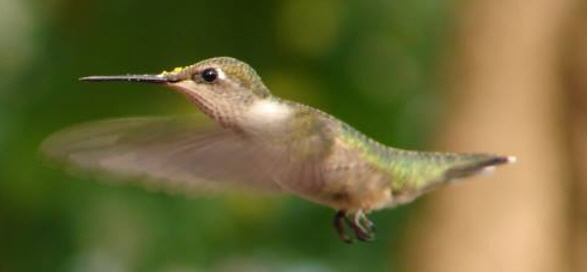
hummingbird in flight

Hummingbirds are always hungry and their favorite food is nectar, be it from the flowers in your garden or from a special feeder.
Please skip the food coloring! Some research suggests this addition is not a healthy choice for birds. The final word is still out on the subject, we suggest erring on the safe side. Choose feeders with prominent colors or hang out some of last years Christmas bows near your nectar feeders instead.

Nectar Recipe

Combine 1 part white sugar to 4 parts water. Bring to slow boil for 2 minutes. Cool before pouring into feeder. Excess may be stored in the refrigerator.

Potato Tower

The end of an odd winter..Spring is here.
The morning air is crisp, the sun is warm, and baby plants are stirring. And with temperatures hovering around 50 degrees or so, it’s time to put out the potatoes here in Tennessee.
You may be familiar with our last potato tower experience, or maybe not.  It was nothing to write home about.  For one thing, I used grocery store potatoes. That’s a big No-No but I had to find out for myself.  Grocery store potatoes are treated with anti-sprouting agents and as you can guess, i ended up with a big pile of – Nothing.
This year, I am using certified seed potatoes and my towers is made with a combination of compost and straw.

Here’s whPotato Towerat you’ll need:
~ cardboard
~ a cage. I used a stretch of fencing joined in the round
~ straw
~ a bucket-full of compost
~ seed potatoes

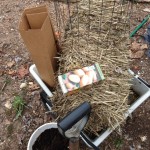
potato tower step 1

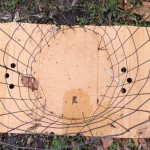
Start by setting up the cage on top on the cardboard,  this will go a long way in keeping the weeds out of the potato tower. Next, add a thick layer of straw to the bottom of the cage, top the straw with your 2/3 of your compost.
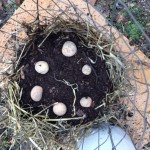
Potato Tower step 3
Push the seed potatoes into the compost and cover with Potato Tower step 4the remaining compost.  Top with another layer of straw.
Once the potatoes sprout out, keep adding straw to the tower, keeping about 4 inches of greenery exposed at all times.  Stop adding when the plants set blooms.

So far it’s looking good, don’t you agree?