Secrets of Successful CLEMATIS PRUNING

Are you wondering whether you should prune your clematis plants in Spring?

There is a ton of information on the internet to tell you when and how to prune your clematis for best flowering and encouraging full growth. One can spend hours reading about all the different types and the pruning recommendations. By the end of the day, however, spring pruning boils down to this:

If it blooms before June, don’t prune.

Blooming Clematis

You can spring-prune your autumn clematis and other late summer blooming clematis by cutting them down to about 1/3. That will remove ratty, left-over foliage and promote fuller growth and flowers for this season.

Don’t have any clematis? They are carefree plants that will climb up on most any support and attract pollinators while looking spectacular at the same time.

Click here to see our clematis – great varieties and prices – guaranteed!

Daylily Dividing in 3 Easy Steps

Too many Daylilies.  Said nobody.  Ever.

Probably the most known and common method of propagation is digging up the root ball and dividing the rhizomes. This can be done most anytime the plant is not in bloom. Ok, I admit, I have dug and divided them while in bloom but I can’t think of any reputable garden source that recommends this method! Generally, most sources suggest tackling this task in fall or early spring.
daylily divisions
1. Dig up the clump

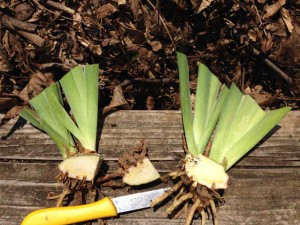
2. Divide by pulling or cutting apart the root ball

3. Trim as needed, replant or share.

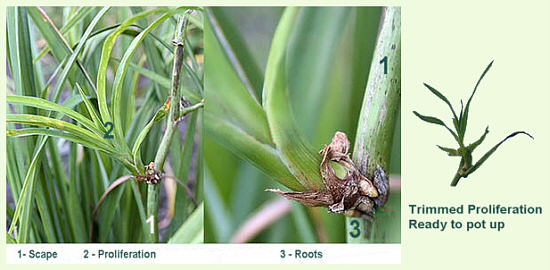
Another, lesser known, method is to harvest the proliferations. After the daylilies have finished blooming and before the stalks turn completely brown, it’s a good time time to check the scapes for proliferations. Cut any you find with about 2 inches of stalk remaining and pot them up. Don’t have any pots around? Put the ‘baby’ in a glass of water. Be sure to label them so you’ll know “who’s who” in the spring.
Keep them in a sunny window for the winter before transplanting them back into the garden come spring. This proliferation will be an identical twin to the parent plant.
Daylily ProliferationsIn just a little time, you have increased your supply of lovely daylilies for your own garden or as gifts to your family and friends.

2014 Fall Sale & a Friendly Plant Swap

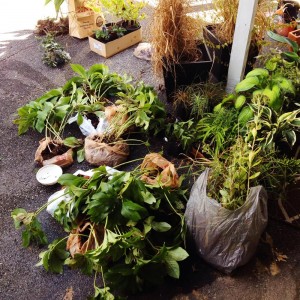
Have you ever been to or hosted a plant swap? A few of my friends have started getting together in the spring and in the fall to trade plants and I attended for the first time a couple of weeks ago. It’s a really nice way to get rid of the plants you need to thin out.

plantswapplants

photo credit: Modern Sauce, the lovely hostess of the 2014 fall plant swap

I took oregano, lemon balm, sedum, bee balm, lilies, and cannas. Others brought hostas, hellebores, and iris. Everything found new homes, and then we piled in a car and went to the wonderful Green Thumbs Galore Fall Driveway Sale. Everyone bought a few plants and we joked that next year we’ll be bringing cuttings from our purchases to the swap!

There are lots of reasons plant swaps are fun. You get to hang out with people who have at least one common interest. It’s a fun way to get ideas on how to deal with problem areas in your yard or garden. We talked about things we’d like to do, someday. One person wants to learn more about propagation; I want to learn more about fruit trees. Plus, you might end up with some new plants!

One attendee said the best thing about a plant swap is that if the plant dies, you can blame the person who brought it. That seems reasonable enough to me!

From the plant swap, I brought home some hellebores, for the only shady area in my yard, and some rosemary cuttings. The hostess had a big rosemary plant. It’s the only one I’ve seen that survived last year’s extra hard winter. I’ve got 10 cuttings in water. If they root successfully I’ll take most of them to the next swap in pretty little pots.

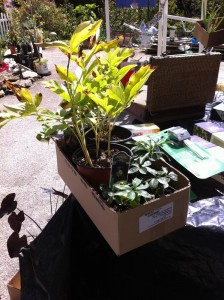
greenthumbssaleplants

Photo credit: Emily Fazio, plant swapper extraordinaire!

At the sale, I got Russian sage, a crocus, and some gaillardia. I’ve wanted Russian sage for years. It is a beautiful color and has a really wonderful texture. A friend used to grow it and include it in gorgeous bouquets of cut flowers. Gaillardia is simply cheerful. I love the bright color and long blooming period. The crocus was completely an impulse buy — I’m not even really sure what the bloom of a crocus looks like!

The combination of the plant swap and going to the sale was great. I hope that it becomes a set in stone tradition.


Mystery Plants

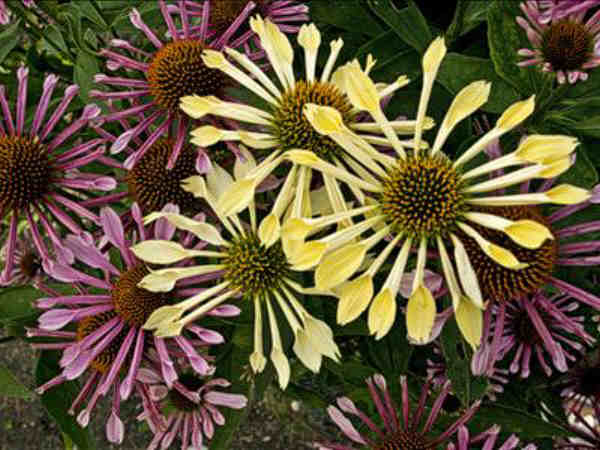
Do you have plants in your garden that are a mystery to you? Being a very relaxed gardener, I usually have a few mysteries in the garden: plants that I just don’t know much about. At the moment I have two. One is a seven foot tall beauty that looks like some variety of rudbeckia.

mystery yellow flower

mystery yellow flower

The other is, I think, in the mint family. I didn’t expect these beautiful flowers.

mystery purple flower

mystery purple flower

In the spring time, I wrote about a different kind of mystery — when you plant something, like an iris or a tulip and you don’t know what the bloom will look like. You do, however, know what an iris or a tulip generally looks like. In the case of these two plants, I had no idea. A friend sent them to me in early spring when they were both basically just roots in a clump of dirt. She didn’t know the name of the yellow one, and I’ve forgotten what she told me about the purple one.

Watching the foliage grow, then seeing the flower buds develop, and finally enjoying the beautiful blooms made for an entertaining summer. They are adding so much color to my late summer garden, too — which is nice because it seems like the majority of my flowers are spring bloomers.

Have you had any surprises this summer? Or, have you ever planted something having no clue what you would end up with?


Playing Favorites

Each year, I try to choose a favorite in my garden. I’ve been thinking about this post for a few weeks now, trying to decide which flower would be named my 2014 favorite. I wanted it to be a new plant, but instead, it’s one that has matured and become even more beautiful: my pond lily:

pond lilyA friend bought a new house and it had a small pond, but the liner leaked. It just held a small, icky puddle — and a pond lily. She asked if I’d like to have the lily in my pond, and since I have trouble saying no to any plant, I took it home.

It was sitting on the edge of the pond and  one of my dogs ran past and knocked it over. The pot floated to the top and I thought it might not survive. But it did, and this year, there are two or three blooms each day.

They are a glorious pale pink with beautiful yellow centers. The leaves are beautiful too, with shades of green and red. The frogs love them and hide among them all the time. Even though it’s a tad invasive, and I’ll probably have to pull some of it up, for now, the pond lily is the favorite flower in my garden.

What is your 2014 favorite?

Violas, Violas Everywhere

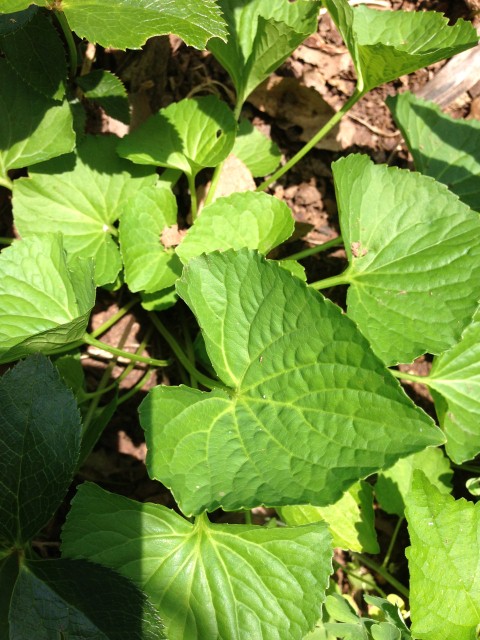
Weeding.  There no other garden chore that is so destructive and satisfying at the same time. With elbow grease, plastic, paper and heavy mulching, we’ve managed to remove many undesirable plants from our garden.  One of the plants that has been defying all our efforts to this time has been violas.  Not African Violets but those little, pesky, violet spring blooming flowers that pop up in lawns and shady areas.

This year, I am sparing them from the sharp edge of the weeding tool.
Why?  Sweet Violet Sirup.
On our walking trip along the Le Puy Way of the Camino de Santiago this summer, one of the most refreshing drinks we encountered was chilled violet water made from home-made violet (viola) sirup. It’s the French answer to Iced Tea and much tastier.

Here’s the recipe:
1 cup viola flowers, remove stems and rinse. Put into a glass (Mason) jar.
Pour 1 cup of boiling water over the flowers and let mixture sit covered for 24 hours.
Put mixture in saucepan, add 1 cup sugar and bring to a low boil, stir until all the sugar has dissolved.  Strain through a fine sieve or cheesecloth, label bottle and store in a cool place for up to 12 month.

A little of the sirup goes a long way; add to plain or sparkling water, ice cream, etc.

Viola Plant

Viola Plant

Iris Seedpod First Aid

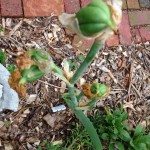
broken iris stem with seedpod

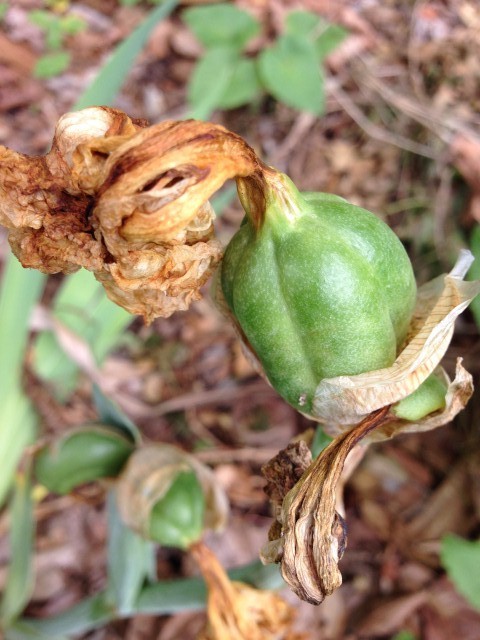
Maybe you tried your hand at pollinating some of your iris or maybe the bees went to work.  Either way, your iris flowers have faded away and there’s seedpods in the making. Like a proud parent, you’re admiring the pods and imagining growing the seeds into beautiful new plants.
iris stem set into the ground
Oh no!  You see a broken off stalk.  Compost.  Goodbye dreams of spectacular flowers. Worry not, here’s what you can do to save the day and let the pods continue on to maturity.

Trim the bottom off the stalk and insert firmly about 2-3 inches deep into the soil.  You’re done!  Really!  Watch the pods mature and collect the seeds once the pods have ripened.

Iris Seedpod

Developing Iris Seedpod

How to divide and plant Iris

The first thing you should know about dividing iris is that iris are tough. Most iris can withstand an amazing amount of neglect and rough handling. This is not to say you should abuse your iris, but you also don’t need to worry too much when you are working with them.

Most planting guides recommend that you divide iris about 3-4 weeks after they have finished blooming. There’s a high likelihood that they will not bloom the year after you divide and transplant them. They are just settling into their new home; you didn’t kill them!

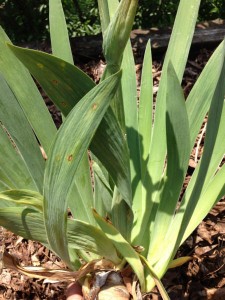
Iris grow from rhizomes (the solid part between the leaves and the roots) . Each iris rhizome will bloom only once – and this rhizome is largest right after the flowers are done blooming. When your iris are getting crowded, you can often see the rhizomes, sticking out of the ground a little. The fact tIris plant after bloominghe rhizomes are so shallow makes them really easy to dig up. The easiest way is to use a fork — simply insert the fork near the edge of the rhizome and wiggle it around a little and it will pop up easily.

Brush the dirt off so you can see the rhizome and have an idea of what you are working with. Some guides suggest that you’ll need to get out the hose and thoroughly clean the rhizome. There’s no harm in doing that, but it won’t make a bit of difference if you skip this step.
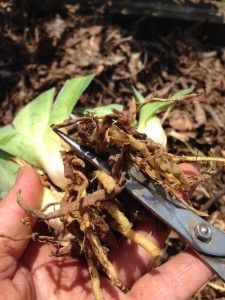
trimming iris rootsTrim back the leaves to about 3 inches.  You can cut them into any shape you want, straight across or fans, even zigzag! Then trim all the roots to about an inch long below the rhizome and

Cut or break off your baby iris rhizomes from the center ‘mother’.  If there are no new babies on the mother yet, plant the mother.
Most likely there will be many more iris then you have space in the old location, either plant them in a new spot or share the extras with your friends and neighbors. Baby iris ready to plant
To plant, insert your rhizomes up to its neck into the ground and water them in. You should not be able to see any part of the rhizome sticking up.
I know you’ve heard that the rhizomes should be above the ground and ‘be kissed by the sun’.  If you plant them too high, they are much more likely to #1 fall over and uprooted on the new roots they are developing and #2 dry out and die.  Pretty much all iris nurseries and hybridizers from Canada to Australia plant their iris ‘to the neck’.

Newly planted iris

Newly planted iris


Forgetfulness in the Garden

As soon as it was warm enough, I was out in the garden digging around. I had a few hardy perennial seeds to put out, and decided last year to consolidate two or three beds into one big one so still had a few things to move. There was also a tall, floppy sedum that
the consequences of bad (read: no) garden planning

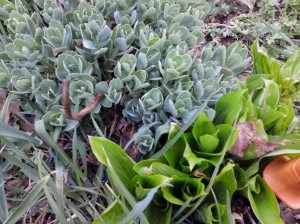
The sedum ended up on top of a hosta. Now I’ll spend the summer seeing which one dominates.

needed to go from the center of the garden to the outskirts.

Anyway, there was almost immediately a problem: not everything was up and I had exactly zero markers. Deciding to rely on memory alone (yes, yes, laugh if you must), I planted some asparagus, moved the sedum, scattered some rudbeckia seeds, built a grape arbor, and moved some raspberry plants.

When it became obvious that markers are a necessity in my garden, I started researching different ways to make them (because of course I don’t want to buy them — that would be money that could be spent on plants!) There are some great ideas out there, and I just happened to have a bag of old silverware.

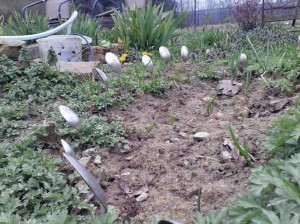
Flattening spoons and stamping names of plants on them seemed like a lot of work, so I decided to just stick them utensils in the ground next to the plants as they came up. Forks marked the hostas, for example. Immediately, my husband started listing off all the reasons this was a terrible idea (mostly he thought the dogs would pull the silverware up and scatter it all over the yard and make mowing hazardous). I ignored him and proceeded to plant spoons and forks all over the garden.

A couple of hours later, I was walking around, staring at the ground, looking for anything new popping up (I spend hours doing this every spring), and noticed that a fork was missing. The inevitable “I told you so!” was not long in coming…but then I found the fork — buried all the way in the ground. Someone had stepped on it!

Clearly ONE piece of flatware would not do the trick. The next week I planted a small
Spoon markers

Spoon markers

patch of onions, and used spoons to outline it.

While this works great for the onions, it’s not really practical for each hosta, coneflower, peony, and other perennial in my garden. The search for effective, attractive, and free markers continues!

Belle’s suggestions:
Try knives and write on them with a paint pen or a bit less attractive but  functional: plastic slats from window blinds and write on them with nail polish pens.