Daylily Dividing in 3 Easy Steps

Too many Daylilies.  Said nobody.  Ever.

Probably the most known and common method of propagation is digging up the root ball and dividing the rhizomes. This can be done most anytime the plant is not in bloom. Ok, I admit, I have dug and divided them while in bloom but I can’t think of any reputable garden source that recommends this method! Generally, most sources suggest tackling this task in fall or early spring.
daylily divisions
1. Dig up the clump

2. Divide by pulling or cutting apart the root ball

3. Trim as needed, replant or share.

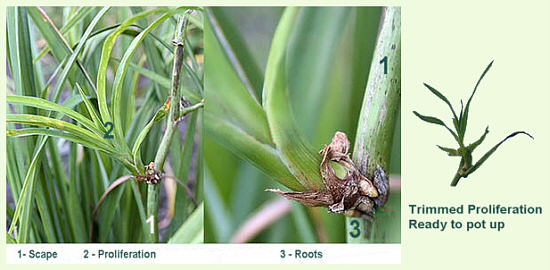
Another, lesser known, method is to harvest the proliferations. After the daylilies have finished blooming and before the stalks turn completely brown, it’s a good time time to check the scapes for proliferations. Cut any you find with about 2 inches of stalk remaining and pot them up. Don’t have any pots around? Put the ‘baby’ in a glass of water. Be sure to label them so you’ll know “who’s who” in the spring.
Keep them in a sunny window for the winter before transplanting them back into the garden come spring. This proliferation will be an identical twin to the parent plant.
Daylily ProliferationsIn just a little time, you have increased your supply of lovely daylilies for your own garden or as gifts to your family and friends.

Chestnuts – Fresh from the Garden

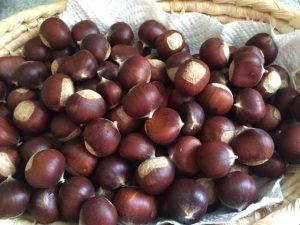
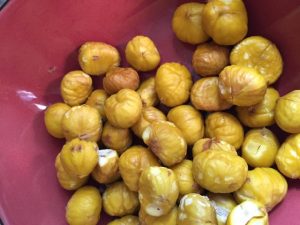
Fresh Chestnuts
The chestnuts are looking great this year!  They feel solid and I have been picking them them this morning.  Picking chestnuts is a prickly affair, one best wears heavy shoes and gloves. If you are fortunate to have a chestnut tree in your garden, it’s well worth the effort!

chestnuts


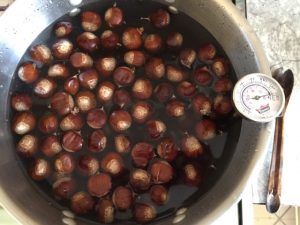
Once harvested, the nuts are  washed and then soaked in hot water (120-125F) for 30 minutes. Any nuts that float to the top are considered ‘not good’ and are discarded. They are then cooled, dried and stored at 35-40F in cloth bags. They will keep for weeks until ready to roast.


How to roast
chestnuts
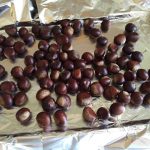
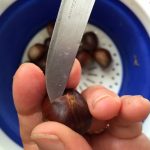
chestnunts on baking sheetslitting chestnut
1. preheat the oven to 425F  
2. cut a Y slit into each nut

3. line cookie sheet with foil and spread out the nuts in a single layer
4. fold up the foil, leaving opening on the sides, then add 1/2 cup waterPeeled Chestnuts
5. roast for ~20 minutes
6. take out of oven, peel and enjoy

Roasted nuts can be shelled and frozen for later use.  Shelling is much easier when the nuts are hot. I leave the pan in the oven and get 2-3 nuts out at a time, then pack them in ziplock bags and put in the freezer.

2014 Fall Sale & a Friendly Plant Swap

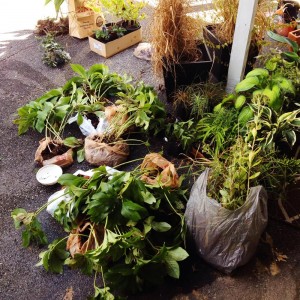
Have you ever been to or hosted a plant swap? A few of my friends have started getting together in the spring and in the fall to trade plants and I attended for the first time a couple of weeks ago. It’s a really nice way to get rid of the plants you need to thin out.

plantswapplants

photo credit: Modern Sauce, the lovely hostess of the 2014 fall plant swap

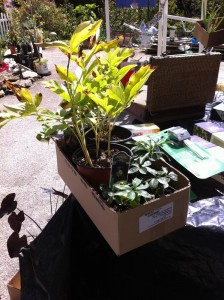
I took oregano, lemon balm, sedum, bee balm, lilies, and cannas. Others brought hostas, hellebores, and iris. Everything found new homes, and then we piled in a car and went to the wonderful Green Thumbs Galore Fall Driveway Sale. Everyone bought a few plants and we joked that next year we’ll be bringing cuttings from our purchases to the swap!

There are lots of reasons plant swaps are fun. You get to hang out with people who have at least one common interest. It’s a fun way to get ideas on how to deal with problem areas in your yard or garden. We talked about things we’d like to do, someday. One person wants to learn more about propagation; I want to learn more about fruit trees. Plus, you might end up with some new plants!

One attendee said the best thing about a plant swap is that if the plant dies, you can blame the person who brought it. That seems reasonable enough to me!

From the plant swap, I brought home some hellebores, for the only shady area in my yard, and some rosemary cuttings. The hostess had a big rosemary plant. It’s the only one I’ve seen that survived last year’s extra hard winter. I’ve got 10 cuttings in water. If they root successfully I’ll take most of them to the next swap in pretty little pots.

greenthumbssaleplants

Photo credit: Emily Fazio, plant swapper extraordinaire!

At the sale, I got Russian sage, a crocus, and some gaillardia. I’ve wanted Russian sage for years. It is a beautiful color and has a really wonderful texture. A friend used to grow it and include it in gorgeous bouquets of cut flowers. Gaillardia is simply cheerful. I love the bright color and long blooming period. The crocus was completely an impulse buy — I’m not even really sure what the bloom of a crocus looks like!

The combination of the plant swap and going to the sale was great. I hope that it becomes a set in stone tradition.


The Apple Jelly Saga — Part 2

A few weeks ago, I wrote about my first attempt at making apple jelly. (spoiler alert: it didn’t go well) As promised, this is the sequel to that post. It’s a good thing the apple trees were productive this year…

The Second Attempt

Making true apple jelly means extracting the juice from the apples. In all my research, it seemed that most folks cooked the apples until tender then hung them in a cheesecloth bag or strainer over night and let the juice drip down into a bowl.

Since making the jelly on my own was a failure, I decided to get the family involved on the second attempt. The apple trees grow on the family farm, after all. We didn’t have any cheesecloth, but we did find a new, clean, white undershirt — you know the kind commonly called a “wife beater.”

We cooked down the apples, then pulled the shirt over a huge mixing bowl. Of course when we put the apples into the shirt, it just fell down to the bottom. Since we are creative people, and there were about 10 of us trying to come up with a solution, we knew there had to be a way! There was: duct tape.

We taped the shirt to the bowl so that it wouldn’t fall down, put the apples in, and covered the whole mess. The next day…there was about ¼ cup of juice in the bottom of the bowl. I still don’t understand why our brilliant idea didn’t work. But, since it takes about 7 cups of juice to make a batch of jelly we were out of luck. Again.

At this point, I was ready to abandon the entire idea of making a sweet, preserved treat from the apples. I was leaning heavily toward slicing them and making half-cooked pies to freeze and use all winter. Because apple pie, right?

The Third Attempt

Then, I came across this recipe for Rosemary Infused Apple Preserves, and noticed that
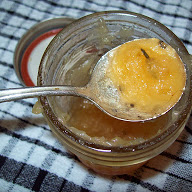
I left the rosemary instead of removing it like the recipe instructed.

I left the rosemary instead of removing it like the recipe instructed.

you used the whole apple — no need to extract the juice! I had to try one more time. Happily, the same day I made preserves, I’d promised to show a cousin how to bake homemade bread. We ended up with fresh, hot bread and homemade preserves. At the same time! It was a moment of culinary bliss.

This recipe resulted in something that seemed more like applesauce than it did anything else — but the most flavorful applesauce I’ve ever had. Since I’m a rebel, I didn’t really follow the recipe. Here’s what I did instead:

  • Peel, core, and chop the apples
  • Cook until they are soft, with a few sprigs of rosemary
  • Taste
  • Add the desired amount of sugar (I used significantly less than the recipe called for)
  • Squeeze the juice of a lemon in
  • Cook until the sugar is dissolved
  • Mash and stir until you have a consistency you like
  • Load into clean, sterilized jars and process in a water bath


I haven’t tried it yet, but these preserves would be delicious with a strong cheese. Or maybe with a pork roast. Definitely on breakfast toast. Next year, I’m skipping the jelly attempts and going straight for these preserves!

The Apple Jelly Saga – Part 1

Last winter, I planted several apple trees — two in my yard, and four at the family farm. Of the two in my yard, one is doing spectacularly. It needs to be pruned, but is healthy and growing well. The other was the victim of a small accident — my husband cut down a small mimosa growing on our fence line and it fell directly onto the apple tree, breaking most of its tender branches and splitting the trunk all the way down to about a foot off the ground. But it came back! I couldn’t believe it when I found new growth all around where it had been split. We’ll see what it does next year.

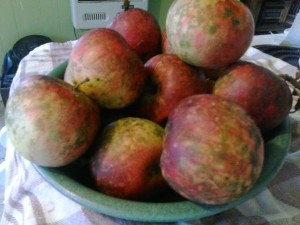
Of the trees at the farm, one appears to be dead, another is living but suffering, and two others are doing well. I’ve tried to identify the pests and/or disease that killed the first one, but apples are susceptible to so many different things. We are lucky to also have two fully mature, producing trees at the farm! They are old — they’ve been there as long as I can

They may not be grocery store pretty, but they are farm fresh delicious!

They may not be grocery store pretty, but they are farm fresh delicious!

remember — and no one is sure what variety they are. The fruit is small, splotchy red, and very slightly tart.

This year, they both produced heavily so I decided to try my hand at making apple jelly. Then I read some recipes and decided to try apple preserves instead! What I actually ended up with could be more accurately described as apple flavored syrup with pieces of apple…Here’s the recipe I (sort of) followed: http://www.tasteofhome.com/recipes/caramel-apple-jam.

I say “sort of” because I did things out of order, which, no doubt, was the downfall of my preserves. I put everything in the pot together and simmered it until the apples were tender, then brought it to a boil and then put it in sterilized jars. It didn’t gel. Live and learn,

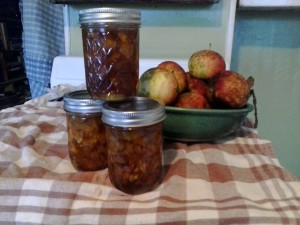
The jars look nice, anyway!

The jars look nice, anyway!

my friends.

On a positive note, that apple syrup will be perfect for sweetening oatmeal and for eating with pancakes. AND — there are plenty of apples left to try again. This time, I’m going to go with a traditional jelly recipe, and follow the instructions much more closely. I’ll let you guys know how it works out!


The Finest Figs

Have you ever eaten a fresh fig? Figs have almost no shelf life, and so are not usually sold in grocery stores. Unless you are lucky enough to either have a fig tree in your yard or you have a friend with a fig tree, you may not have had the pleasure of eating a perfectly ripe fig.

One of the great pleasures of growing edibles is the ability to grow things you can’t easily get a the store. For instance, even though you can usually purchase heirloom tomatoes in a rainbow of colors when they are in season, you can’t usually buy marinara sauce made from heirlooms. But if you grow your own, you can make whatever you like from them!

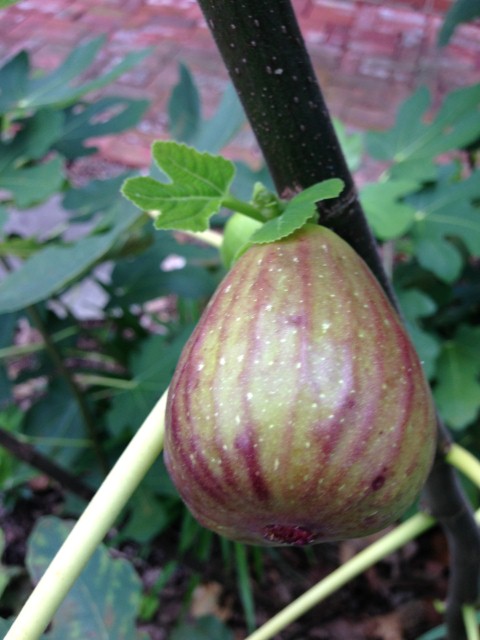
2014-09-03 15.13.16 (Small)Figs are delicate. They have a delicate flavor, and they don’t pack or ship well. They are best consumed within hours of being picked. Of course, if you have a tree full of figs, you may not be able to eat them all as soon as they are ripe — though Belle tells me that she and Jeff wish every year that their tree would produce more figs!

There are several ways to use ripe figs, from recipes like bacon wrapped figs to making fig preserves. Here are some great directions for freezing figs from pickyourown.org. Then, you just thaw them, and eat them whenever you feel the need for a taste of summer.

Belle and I had lunch at Community Pie a couple of summers ago and she ordered sweet fig pizza with prosciutto, Gorgonzola, kalamata olives, goat Gouda fig preserves, and arugula, and it was absolutely delicious! If you make your own fig preserves you’re sure to find plenty of creative ways to use them, as long as you don’t eat them all up on toast, which is probably what I would do.

Fig trees are easier to grow than many other types of fruit trees, and they make a lovely addition to the landscape. Figs should be planted in the spring, so you have plenty of time to plan and order yours!


Planning a Winter Vegetable Garden

There’s nothing quite like putting those first few seeds in the ground in the spring time. But, there is something to be said for sowing in late summer, too. I look at our giant garden right now — and even though there is a blister on my thumb from snapping beans — feel sad that there will be months when I won’t be able to walk out and get a tomato or a squash for dinner. This year, we are going to have a fall/winter garden so the fresh food can go on!

The most important part of planning a winter garden is counting days. For plants like beets, which do well when it’s chilly but can’t take frost, you look at the days to maturity and the average first frost date for your area. For example, I want to grow some Chioggia Beets this fall. It takes 52 days for them to reach maturity. The average first frost date for Chattanooga is October 15. Today is August 18, so I better get the seed in the ground…immediately!

Other plants, such as spinach and kale are frost tolerant, so the counting of days is less important. We will mix together turnip green, mustard, spinach, and kale seed and broadcast them for a mixed greens patch that will provide beans right up through December or so. That’s the plan, anyway.

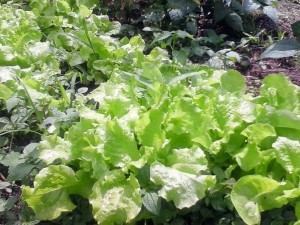
Lettuce matures quickly and doesn't mind cool temps, making it an excellent fall garden option.

Lettuce matures quickly and doesn’t mind cool temps, making it an excellent fall garden option.

There are plenty of vegetables for a fall/winter garden: onions, broccoli, cabbage, garlic, greens, and many root crops. It’s not exactly the same as a bounty of tomatoes and corn, but even a little bit of time in the garden and fresh produce on the table does a body good! Do you regularly grow fall and winter vegetables?