Chestnuts – Fresh from the Garden

Fresh Chestnuts
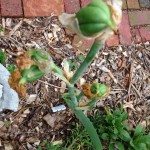
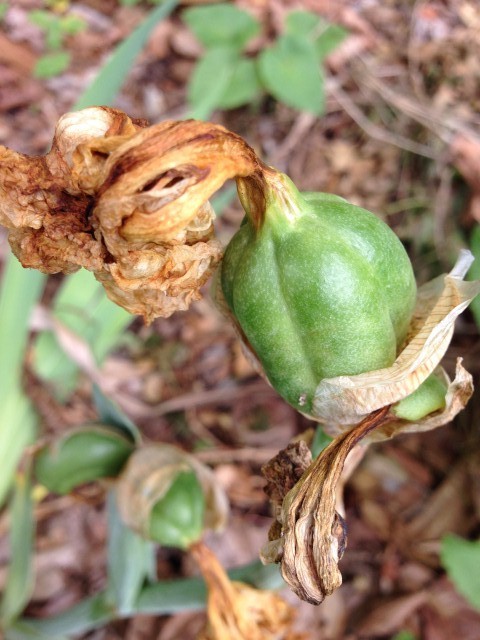
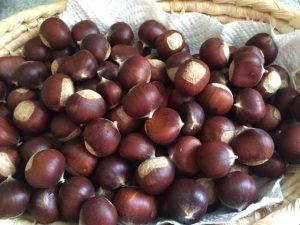
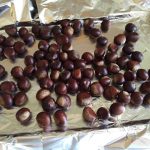
The chestnuts are looking great this year!  They feel solid and I have been picking them them this morning.  Picking chestnuts is a prickly affair, one best wears heavy shoes and gloves. If you are fortunate to have a chestnut tree in your garden, it’s well worth the effort!

chestnuts


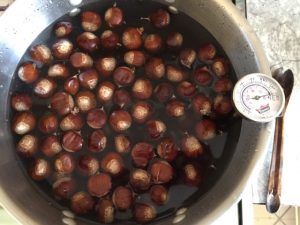
Once harvested, the nuts are  washed and then soaked in hot water (120-125F) for 30 minutes. Any nuts that float to the top are considered ‘not good’ and are discarded. They are then cooled, dried and stored at 35-40F in cloth bags. They will keep for weeks until ready to roast.


How to roast
chestnuts
chestnunts on baking sheetslitting chestnut
1. preheat the oven to 425F  
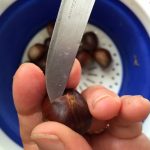
2. cut a Y slit into each nut

3. line cookie sheet with foil and spread out the nuts in a single layer
4. fold up the foil, leaving opening on the sides, then add 1/2 cup waterPeeled Chestnuts
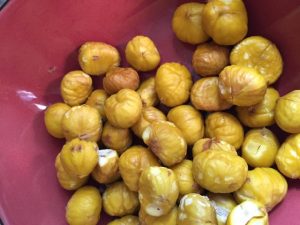
5. roast for ~20 minutes
6. take out of oven, peel and enjoy

Roasted nuts can be shelled and frozen for later use.  Shelling is much easier when the nuts are hot. I leave the pan in the oven and get 2-3 nuts out at a time, then pack them in ziplock bags and put in the freezer.

Odenwälder Kochkäse – German Cooked Cheese – Recipe

One of our favorite foods when visiting Germany is Kochkäse, a creamy, semi-liquid cheese that is served on bread, on top of Schnitzel, or it can be eaten like a dip with crackers.  There is no shortage of recipes, most of them use ingredients impossible to find in the US, take weeks to prepare, or are complete fails in the flavor department.
For the last 20 years I have tried to make this delicacy here in Chattanooga. For the first time…..SUCCESS…Here’s my recipe using Greek Yogurt.

Koch Käse with crackers

Koch Käse with crackers

Ingredients:
1 Large (35.3 ounce) container 2% Fage Greek Yogurt
2 1/2 teaspoons Natron (Baking Soda)
2 teaspoons Salt
2 tablespoons Butter
2 teaspoons caraways seeds (if desired)

Yogurt with Natron and Salt

Yogurt with Natron and Salt

Instructions:
1. Strain the yogurt in the fridge overnight.
Line a strainer with cheesecloth (a kitchen towel, coffee filter or clean handkerchief will do too). Set the strainer over a bowl and pour the yogurt into the lined strainer.
2. Pour the thick yogurt into a bowl and mix well with the Natron and Salt, using a wooden spoon.  Cover the bowl and let sit out on the counter at room temperature.  Stir every few hours until the mixture is translucent. This process will take about 24 hours.
3. Pour the mixture into a pot, add 2 tablespoons Butter. Stir constantly and slowly warm on VERY LOW setting until it has the consistency of vanilla pudding.  DO NOT let this mixture get hot or it will curdle.  If desired, add caraway seeds.
4. Pour into containers and store covered in fridge, will keep 2 weeks.

Finished Kochkäse

Finished Kochkäse

Bite Back at Henbit

Come visit and take a look in our gardens, you’d surely soon guess my favorite color in plants. From light lavender to a deep, nearly black – purple – it’s present in every bed and during every season.

But not every purple flowering plant is a keeper. Henbit – OH NO! I have no idea where it came from but it’s everywhere in our garden. Lamium amplexicaule officially is a member of the mint family, flowers during cool weather and is present throughout the US.

Henbit plant

Henbit – GO AWAY!

Mulching

My favorite method, so I’ll mention it first. Spread newspapers, flattened cardboard boxes and junk mail around the plants and cover with a thick layer of compost or mulch. Instantly, the beds look great and cared for and weeds stay suppressed all season. You may be tempted to go for weed fabric or plastic – resist and use biodegradable paper. It’s better for the environment and there will be no need to wrestle with bits and pieces of material a year or two down the road.
Don’t give weeds a chance to get started!

Hand Weeding

What other activity can you think of that is so destructive and rewarding at the same time?
While not having to hand weed would be the best option at all, no amount of mulching and using groundcovers will eliminate weeds completely. Henbit seems to only need a single ray of sunshine and a speck of dirt to grow into a fine specimen plant!
Try to disturb the ground as little as possible and avoid disbursing weed seeds (don’t shake off the plant) before tossing it. Use a hand weeder or a pair of clippers to cut off at the base. repeat as needed and sooner or later, the roots will be exhausted and incapable of sending up new growth.

Paint Class

So I have been thinking about painting some of the —eeewww brown— furniture in our house for some time.  I am not someone to whom design and matching colors comes naturally so ii have been following Pinterest boards and paint groups on facebook for some time.
Finally, I was ready to take the plunge and try out some painting techniques on an olf board.  I started -per the info I learned from the paint groups- by going to some ACE hardware stores and buying sample paints (on sale 1.99) in the colors I liked, plaster of paris powder, sandpaper, wipe on finish coat, and java gel.

I think it was my good luck to see the ad for the painting class at Redbriar Antiques when i was out shopping.  ‘bring a piece of furniture and leave with it finished’. I signed on the dotted line!

So rather then trying out painting on a scrap board, I jumped in head first and painted this gossip bench.

gossip bench

before

gossip bench

getting ready to paint

gossip bench

painting!

gossip bench

java gel top, purple and cream paint

gossip bench

home again – all finished

Jeff’s Favorite Cake – Recipe

Time: 20 minutes prep, 25 minutes bake, 10 minutes finish
Difficulty: Easy2014-11-27 09.17.44 (Small)Step 1:

100 g butter
100 g sugar
1 package vanilla sugar
4 Egg yolk (large)
200 g flour
1 teaspoon baking powder
Mix butter, egg yolks, sugar, vanilla sugar and beat till fluffy, add in flour and baking powder and stir till smooth.  Spread across TWO springform bottoms, this is a very thin base!

Step 2:

4 egg whites
200 g sugar
1 tablespoon cream of tartar
Make meringue and
spread onto both dough bases.80 g sliced almonds – sprinkle on top of meringue then bake at 350 for 25 minutes. Let cool.

Step 3:

1 pint whipping cream
2014-11-27 09.11.08 (Small) 2 packages whip-it
 1-2 package vanilla sugar
Mix together and whip cream until stiff peaks form, fold in fruit (mandarin oranges, gooseberries, currants, blueberries, etc) and spread on bottom layer of the cake.  Cut the second layer into desired number of slices and put on top. Use a sharp knife and cut the cake all the way through.


My Firefox is Sluggish and Crashes Fix

Are you about ready to throw your Firefox browser in the garbage and go back to MSIE?  It’s slow, it uses up all your memory and then – to add insult to injury – the #$%@#$ plug-in container crashes.

There’s two things that are responsible for your woes.

1. Flashplayer.  nearly every webpage nowadays  has some ad on the page which uses flashplayer.
2. plug-in container.  It came along in the early (think single digit) version of FF and really isn’t needed in the newer versions (24+)

This is a 2 part fix and will work on machines running Win7 and Win8.1, i can’t speak about any other OS. You have nothing to loose if you run other versions of Windows and have googled for a fix, tried all the other ones you found and none worked. I certainly have spent hours looking for help and have tried most every suggestion I have come across.  This solution below is the ‘magic combination’ that  works for the computers I have encountered with this problem.
The images shown were taken from my Win7 system.  For Win8.1 use the search to find system properties.

open add onsStep #1.oen option  turn off autoplay for flashplayer.
open FF >>
Go to options >> click on add-ons >> set flashplayer to ‘ask to activate’

ask to activateStep #2. turn off plug-in container

propertiessys set
>> rightclick ‘computer’ and select ‘properties’

>> click on ‘Advanced system settings’


>> click the ‘Environment Variables’ buttonenvironment

variabl

>> click ‘New…’
in the user section if you want to set this separate for each account or in the system section if you want to set for all users on this machine

edi var
>> type: MOZ_DISABLE_OOP_PLUGINS in the ‘Variable Name’ box and set value to 1
>> click OK. OK. OK. to exit.  Restart Firefox.

Growing Daylilies from Seeds

Are the pods ripe? If it’s been about 7-8 weeks since fertilization and the pods are beginning to turn brown or open up at the tips, the seeds are ready to be harvested.

Collect the seeds and soak them in warm water overnight. The next day, put them in a zip-lock type bag and place the bag in the crisper drawer of your refrigerator.  Daylily seeds require a minimum of 4 weeks cold stratification before they will sprout.  Important: Label your bag prominently so your harvest won’t accidentally end up on your dinner plate.

daylily seeds

daylily seeds

When you are ready to plant the seeds, remove the bag from cold storage.  Check first.  Have the seeds already started to sprout?  If yes, you can go ahead and plant them.  if no, add some water to the bag and leave out in a dark and warm location. For the next week, check daily to see if seeds are starting to germinate.  If there are no white feet popping out, put the bag back into the crisper for a week as the cold period needs to be extended a bit more.

It’s time to plant, what to do?
Plop seeds into pots filled with potting mix and place in a warm and sunny location.  How deep to plant?  Some sources recommend covering with about an inch of potting mix, others suggest they will do fine gently pushed on top of the mix as long as they are kept moist.  I either bury them or cover the pot loosely with piece of plastic kitchen wrap because I tend to forget to mist them as frequently as they like.
Watch for green leaves and once the plants are about 5-6 inches tall they can be planted out in your garden. Soon, you’ll have completely new daylily varieties – that may or may not look anything like their parents – growing in your garden.

Violas, Violas Everywhere

Weeding.  There no other garden chore that is so destructive and satisfying at the same time. With elbow grease, plastic, paper and heavy mulching, we’ve managed to remove many undesirable plants from our garden.  One of the plants that has been defying all our efforts to this time has been violas.  Not African Violets but those little, pesky, violet spring blooming flowers that pop up in lawns and shady areas.

This year, I am sparing them from the sharp edge of the weeding tool.
Why?  Sweet Violet Sirup.
On our walking trip along the Le Puy Way of the Camino de Santiago this summer, one of the most refreshing drinks we encountered was chilled violet water made from home-made violet (viola) sirup. It’s the French answer to Iced Tea and much tastier.

Here’s the recipe:
1 cup viola flowers, remove stems and rinse. Put into a glass (Mason) jar.
Pour 1 cup of boiling water over the flowers and let mixture sit covered for 24 hours.
Put mixture in saucepan, add 1 cup sugar and bring to a low boil, stir until all the sugar has dissolved.  Strain through a fine sieve or cheesecloth, label bottle and store in a cool place for up to 12 month.

A little of the sirup goes a long way; add to plain or sparkling water, ice cream, etc.

Viola Plant

Viola Plant

Making a Daylily Cross

Daylilies are some of the most beautiful and carefree plants in the garden.  They come in many colors, sizes and patterns.  They withstand heat and drought.  They are even edible!
They are plants that do not come true from seed. This means every seed produces a new and unique plant that may or may not look anything like its parent.
And that’s where the fun starts.  How about trying your hand at hybridizing this year?  It’s quite easy and you never know what you might get.  The 3 most common crossing types are:
1. pretty on pretty – pick two varieties in your garden that you really like
2. trait on trait – flower shape, height, number of blooms – your choice
3. intentional – using plant genetic and science to attempt to bring out desirable attributes

Daylily flower with anther and stigma labeled

How to find the Anther and Stigma on a Daylily

Making a cross is quite simple, take the pollen from one variety and apply it to the stigma of another.  Then wait and see if the mating was successful.  If yes, there will be a pod developing at the base of the flower.  Daylily pregnancy takes about 50 days from fertilization until seeds are ripe and ready for harvesting.

Iris Seedpod First Aid

broken iris stem with seedpod

Maybe you tried your hand at pollinating some of your iris or maybe the bees went to work.  Either way, your iris flowers have faded away and there’s seedpods in the making. Like a proud parent, you’re admiring the pods and imagining growing the seeds into beautiful new plants.
iris stem set into the ground
Oh no!  You see a broken off stalk.  Compost.  Goodbye dreams of spectacular flowers. Worry not, here’s what you can do to save the day and let the pods continue on to maturity.

Trim the bottom off the stalk and insert firmly about 2-3 inches deep into the soil.  You’re done!  Really!  Watch the pods mature and collect the seeds once the pods have ripened.

Iris Seedpod

Developing Iris Seedpod